For my final project I created some stairs that will rotate. When it would start it would look like a regular block but as soon you turn on the step motor it will rotate thus creating a stair in a way. I used two different sizes of wooden dowels; I would use the big one as a column for the 5 steps. I would drill holes into the bigger column and insert the smaller dowels so it would rotate with the column eventually moving the step. The step motor is attached to the bottom of the column. The first try I used ¾” mdf, next I would have to do some math because I had to figure out how much I needed to router out of each wooden block. Each step as you move upward would have less use of the router. I started from a half circle for the bottom on the step and then it would decrease by 36 degrees. Eventually reaching 0 in the last step. Then I would drill holes in each block so they would all align with the column.
When putting everything together it takes up some time because you would have to place one step and then insert one small dowel in the column, and so forth for all steps, so there’s was not any use of glue because everything had to be reassembled back and forth. After everything was set up, each block or step is 6”x6”, with five of those it was somewhat heavy for the small step motor to handle. After many tries the motor end up dying because it was forced to move so much weight. The motor would barely more one step, and that’s if nothing was on top of it.
So, after this I decided to try new material because the mdf was to heavy. I tried pink 1” foam (Insulation) it’s the lightest thing compare to mdf. I did the same steps as I did with the other trial, only issue with this is that it’s so messy. Had to be more careful when cutting because it’s very sensible to flip a blade and then causing an injury. Everything worked as planned now. The step motor did not any issues regarding its weight.
My idea for this project is to encourage people to use the stairs more often instead of an elevator. For example, when it comes to going to a second-floor people get lazy and take the elevator. Maybe if they see a revolutionary set of stairs their curiosity will take them and actually use them. Just by walking up or down the stairs it can benefit many things such as the elevator, because it will only be used for buildings that have tall stories. Another thing it can benefit is the person health, by taking the rotating stairs everyday instead of the elevator it can add up and be good for the persons health. But one more and important thought is that, you won’t save any time by taking the elevator because while you’re waiting, you can be on your way to the floor, by taking the rotating stairs in probably less time.
Image Documentation
The small dowels inside the big column
Carving out foam so the small dowel will fit inside.
Drilling a hole below the column so the step motor will fit in.
Place the motor close to the edge, so there’s more rotating space.
Make sure the motor is flush with the surface so the column with steps can be leveled also with the surface.
Arduino Code
#include <MultiStepper.h>
#include <AccelStepper.h>
#define HALFSTEP 8
// Motor pin definitions
#define motorPin1 3 // IN1 on the ULN2003 driver 1
#define motorPin2 4 // IN2 on the ULN2003 driver 1
#define motorPin3 5 // IN3 on the ULN2003 driver 1
#define motorPin4 6 // IN4 on the ULN2003 driver 1
// Initialize with pin sequence IN1-IN3-IN2-IN4 for using the AccelStepper with 28BYJ-48
Do all drawings of the houses in rhino. (1stpicture)
Next, you make sure you do a drawing for every side of the house including two extra drawings for the balcony in the second floor.
Next draw as many windows as possible so more light can get out.
Before exporting also make sure you add a square ¼” pattern on all side so they will fit like a puzzle.
Export the file to Adobe illustrator, to fix line weights and details.
Get your wood and laser cut.
Once its laser cut, put all wood pieces together like a puzzle with glue. (2ndpicture)
Once everything is together, you use the foam board to sperate rooms inside the house. In total there should be 4 rooms including the garage. Also cover the top of it, as if it’s a roof.
Get breadboard
Wire ultrasonic sensor to Arduino, check that the sensor is reading, (3rdpicture)
Next place led’s with resistors on breadboard, make sure they light up properly. (4thpicture)
Next move led’s to Arduino code so it would work with the sensor.
Set sensor to turn on 2 leds at 12 inches, another 2 leds at 6 inches and then the last 2 leds at 3 inches.
Check that it works just by moving your hand.
Next start wiring all leds around the rooms, make sure that there are 2 leds per room.
Place the ultrasonic sensor on the back wall of the house
Next and final step get toy truck and move it inside the garage, as it gets closer to the sensor, each individual room will turn the leds on. (5th& 6thpicture)
Arduino (arduino nano was used in this project) – -$3
MCP9808 (Contact temperature sensor) – $5
Ice – $1
Thermal paste – $1
Android phone – Free -> $$$
OTG cable for phone – $5
USB cable for arduino connectivity – $1
Estimated cost: ~$80
Some parts may be obtainable for less if you reuse old electronics*
Gallery
Testing the capabilities of the peltier. Was able to drop the temperature of the cold side to -18°F with the hot side at room temperature. Approximate thickness of ice I was able to build up from the peltier.Prolonged usage of the peltier (10 minutes?) with water to help keep the hot side temperature managable actually brought the water temperature as high as 109° F! Maximum current draw with the 250 watt peltier at 12v was ~6.5 amps with spikes to 8 amps. A very large load to be able to precisely control with an arduino. Actual power draw is around 80 watts with this setup.Testing the mosfet circuit with a low powered device – LED.Compact version of the led test circuit with an arduino nano instead and beefy copper wires connecting the wire connectors.Realized that I used a mosfet with the wrong specifications. Replaced with a logic level mosfet and additional heatsink and fans to keep the temperature managable.Complete build with cpu fan and heatsink to keep the mosfet cool. In hindsight, a relay could have easily been used. Wasn’t able to take advantage of PWM control to hold the temperature. I did not have time to design and tune a better algorithm to hold the temperature of the peltier precisely. The on/off switching was at a few seconds time scale so a relay would be more than capable of handling that (and only be off by a few degrees from target).Testing the cooler with an aluminum plate instead. The aluminum plate was not the most heat conductive so it couldn’t freeze water. It would probably be possible with a lower hot side temperature by using an ice bath. Either way, only the area around the peltier got cold and the edges did not.The MCP9808 temperature sensor is used to measure the surface temperature of the peltier canvas. The lowest temperature the device can read is -4° F, which means our arduino microcontroller won’t know when to hold the temperature below -4 ° FAs a safety precaution, nail polish was used to electrically insulate the circuit on the MCP9808 temperature sensor.This is the set up to make a Bob Ross quality painting of ice. Notice the -4°F lower limit. Sample painting. Notice an ice bath is used to get even better performance from the peltier.Screenshot of the app in action. The dial lets you adjust the temperature (the needle is where the temperature is at). The blue ring around the dial is the acual temperature. The power bar on the bottom tells the artist how hard the peltier is working to sustain or lower the temperature.
Arduino Code
The arduino has two roles: to report the current temperature to the user interface (android app) and to determine when to power the peltier so that it holds the desired temperature. I initially used an algorithm that increases/decreases the amount of power going to the peltier so that it can just hold that specific power level when the actual temperature reaches an equlibrium. Tuning that algorithm has proven challenging so I opted for a more straightforward approach: when the temerature is too warm, go full blast and chill the canvas, otherwise, let off on the power to the peltier.
#include <Wire.h>
#include "Adafruit_MCP9808.h"

Adafruit_MCP9808 tempsensor = Adafruit_MCP9808();

int peltierPin = 9; // Pin #
int peltierPower = 0;

bool peltierState = false;
float targetTemp = 0;

unsigned long lastProbeSendTime = 0;
unsigned long sendInterval = 500;

void setup() {
  Serial.begin(9600);
  Serial.setTimeout(10);

  pinMode(LED_BUILTIN, OUTPUT);
  digitalWrite(LED_BUILTIN, LOW);

  // Wait for temperature sensor
  if (!tempsensor.begin(0x18)) {
    Serial.println("Couldn't find MCP9808! Check your connections and verify the address is correct.");
    while (1);
  }

  // Ready blink!
  flashLED(3);

  tempsensor.setResolution(1);
  tempsensor.wake();

  lastTemp = tempsensor.readTempF();
}

void loop() {
  if (!Serial) {
    peltierState = false;
  }

  unsigned long currentTime = millis();
  float currentTemp = tempsensor.readTempF();

  // Send probe info over serial
  if (currentTime > lastProbeSendTime + sendInterval) {
    sendProbeUpdate(currentTemp);
  }

  if (peltierState) {
    adjustPeltierPower(currentTemp);
  } else {
    peltierPower = 0;
  }

  analogWrite(peltierPin, peltierPower);
}

void sendProbeUpdate(float f) {
  Serial.print(f, 0); Serial.print(";"); Serial.print(peltierPower); Serial.print(";"); Serial.print(targetTemp, 0); Serial.print("|");
  lastProbeSendTime = millis();
}

void adjustPeltierPower(float currentTemp) {
  float tempDiff = currentTemp - targetTemp; // < 0 temp is too cold | > 0 = temp is too warm

  if (tempDiff >= 0.5) {
    // Too hot
    peltierPower = 255;
  } else if (tempDiff < 0) {
    // Too cold
    peltierPower = 0;
  } // else: hold temp
}

void flashLED(int times) {
  for (int i = 0; i < times; i++) {
    digitalWrite(LED_BUILTIN, HIGH);
    delay(100);
    digitalWrite(LED_BUILTIN, LOW);
    delay(100);
  }
}

void serialEvent() {
  if (Serial.available()) {
    int state = Serial.parseInt();
    int target = Serial.parseInt();
    if (state == 1) {
      // Turn off peltier
      peltierState = false;
      flashLED(2);
    } else if (state == 2) {
      // Set peltier temperature
      peltierState = true;
      targetTemp = (float) target;
      flashLED(1);
    }
  }
}
Android Code
The following is most of the code where the action takes place. I used an open source dial (Croller) for the artist to set the target temperature but then had to modify it so that the outer ring shows the actual temperature. Essentially what this app does is provide an interface for the artist to precisely control the temperature of the canvas. You can use the dial to set the temperature or you can choose from a variety of presets to quickly change the temperature. Being able to precisely control the temperature means the artist can use it for creative effects like diffusing the colors on the canvas or holding the temperature just above freezing so that the ice painting can be lifted off cleanly.
package com.garfiec.icycanvas

import android.animation.ValueAnimator
import android.annotation.SuppressLint
import android.hardware.usb.UsbDevice
import android.support.v7.app.AppCompatActivity
import android.os.Bundle
import android.util.Log
import android.widget.Toast
import com.jakewharton.rxrelay2.BehaviorRelay
import com.sdsmdg.harjot.crollerTest.Croller
import com.sdsmdg.harjot.crollerTest.OnCrollerChangeListener
import io.reactivex.disposables.CompositeDisposable
import kotlinx.android.synthetic.main.activity_main.*
import me.aflak.arduino.Arduino
import me.aflak.arduino.ArduinoListener
import java.util.concurrent.TimeUnit

class MainActivity : AppCompatActivity() {
    private data class PeltierState(val state: Boolean, val temperature: Int)
    private data class PeltierProbe(val temperature: Int, val power: Int)

    private val TEMP_LOW = -30
    private val TEMP_HI = 90
    private val TEMP_START = 50
    private val CROLLER_OFFSET = -TEMP_LOW

    private val PELTIER_STATE_OFF = PeltierState(false, 0)
    private val PELTIER_PROBE_DEFAULT = PeltierProbe(TEMP_LOW, 0)

    private val actualTempValueAnimator = ValueAnimator()
    private val powerLevelValueAnimator = ValueAnimator()
    private val temperatureDialAnimator = ValueAnimator()

    private val log = "MAIN_ACTIVITY"

    private lateinit var arduino: Arduino

    private val disposables = CompositeDisposable()
    private val arduinoOutput = BehaviorRelay.createDefault(PELTIER_STATE_OFF)
    private val arduinoInput = BehaviorRelay.createDefault(PELTIER_PROBE_DEFAULT)

    override fun onCreate(savedInstanceState: Bundle?) {
        super.onCreate(savedInstanceState)
        setContentView(R.layout.activity_main)

        peltier_power_level.max = 255f
        peltier_power_level.progress = 0f

        initTemperatureDial()
        initAnimators()
        initPresetButtons()

        switch_button.isEnabled = false
    }

    override fun onResume() {
        bindPeltierSwitch()
        disposables.add(arduinoInput
            .debounce(50, TimeUnit.MILLISECONDS)
            .distinctUntilChanged()
            .subscribe {
                actualTempValueAnimator.apply {
                    this@MainActivity.runOnUiThread {
                        setFloatValues(temperature_setter.actualValue, (it.temperature + CROLLER_OFFSET).toFloat())
                        start()
                    }
                }

                powerLevelValueAnimator.apply {
                    this@MainActivity.runOnUiThread {
                        setFloatValues(peltier_power_level.progress, it.power.toFloat())
                        start()
                    }
                }
            })

        arduino = Arduino(this, 9600)
        arduino.addVendorId(6790)
        setArduinoListener()

        super.onResume()
    }

    override fun onPause() {
        disposables.clear()
        arduino.unsetArduinoListener()
        arduino.close()
        super.onPause()
    }

    private fun initPresetButtons() {
        flash_freeze_button.setOnClickListener { setDialAnimate(TEMP_LOW) }
        freeze_button.setOnClickListener { setDialAnimate(32) }
        refrigerate_button.setOnClickListener { setDialAnimate(40) }
        cool_button.setOnClickListener { setDialAnimate(60) }
    }

    @SuppressLint("SetTextI18n")
    private fun initAnimators() {
        actualTempValueAnimator.apply {
            addUpdateListener {
                actual_temp_label.text = "${(it.animatedValue as Float).toInt() - CROLLER_OFFSET}°F"
                temperature_setter.actualValue = it.animatedValue as Float
                duration = 300
            }
        }
        powerLevelValueAnimator.apply {
            addUpdateListener {
                peltier_power_level.progress = it.animatedValue as Float
                duration = 300
            }
        }
        temperatureDialAnimator.apply {
            addUpdateListener {
                temperature_setter.targetValue = it.animatedValue as Float
                duration = 1000
            }
        }
    }

    private fun initTemperatureDial() {
        temperature_setter.min = TEMP_LOW + CROLLER_OFFSET
        temperature_setter.max = TEMP_HI + CROLLER_OFFSET
        temperature_setter.targetValue = (TEMP_START + CROLLER_OFFSET).toFloat()
        temperature_setter.actualValue = (TEMP_LOW + CROLLER_OFFSET + 30).toFloat()

        temperature_setter.setOnCrollerChangeListener(object : OnCrollerChangeListener {
            @SuppressLint("SetTextI18n")
            override fun onProgressChanged(croller: Croller?, progress: Int) {
                target_temp_label.text = "${temperature_setter.targetValue.toInt() - CROLLER_OFFSET}°F"
            }

            override fun onStartTrackingTouch(croller: Croller?) {
            }

            override fun onStopTrackingTouch(croller: Croller?) {
                if (switch_button.isChecked) {
                    updateThermostat(true)
                }
            }

        })
    }

    private fun setDialAnimate(temperature: Int) {
        temperatureDialAnimator.apply {
            this@MainActivity.runOnUiThread {
                setFloatValues(temperature_setter.targetValue, (temperature + CROLLER_OFFSET).toFloat())
                start()
            }
        }
    }

    private fun getDialTemp(): Int {
        return (temperature_setter.targetValue - CROLLER_OFFSET).toInt()
    }

    private fun setDialTemp(temperature: Int) {
        temperature_setter.targetValue = (temperature + CROLLER_OFFSET).toFloat()
    }


    private fun bindPeltierSwitch() {
        switch_button.setOnCheckedChangeListener { _, isChecked ->
            updateThermostat(isChecked)
            if (isChecked) {
                status_label.text = "Cooling"
            } else {
                status_label.text = ""
            }
        }
    }


    private fun updateThermostat(state: Boolean) {
        if (state) {
            arduinoOutput.accept(PeltierState(true, (temperature_setter.targetValue).toInt()))
        } else {
            arduinoOutput.accept(PELTIER_STATE_OFF)
        }
    }


    private fun setArduinoListener() {
        arduino.setArduinoListener(object : ArduinoListener {
            private var inputBuffer = ""

            override fun onArduinoAttached(device: UsbDevice?) {
                Log.i(log, "Arduino Attached: ${device.toString()}")
                runOnUiThread {
                    Toast.makeText(this@MainActivity, "Arduino connected!", Toast.LENGTH_SHORT).show()
                }
                arduino.open(device)
                switch_button.isEnabled = true
            }

            override fun onArduinoMessage(bytes: ByteArray) {
                Log.i(log, "Arduino Message ${String(bytes)}")
                inputBuffer += String(bytes)

                val input = String(bytes).split("|").takeLast(2)[0]
                input.split(";").takeIf { it.size == 3 }?.let {
                    inputBuffer = ""
                    try {
                        arduinoInput.accept(PeltierProbe(temperature = it[0].toInt(), power = it[1].toInt()))
                        val arduinoTargetTemp = it[2].toInt()
                        if (arduinoTargetTemp != getDialTemp() && switch_button.isChecked) {
                            Log.i(log, "Resending")
                            arduinoOutput.accept(PeltierState(true, getDialTemp()))
                        }
                    } catch (e: Exception) { }
                }
            }

            override fun onArduinoDetached() {
                Log.i(log, "Arduino Detached")
                switch_button.isChecked = false
                switch_button.isEnabled = false
                arduinoInput.accept(PELTIER_PROBE_DEFAULT)
                actual_temp_label.text = "--°F"
            }

            override fun onArduinoOpened() {
                Log.i(log, "Arduino Opened")
                disposables.add(arduinoOutput
                    .debounce(50, TimeUnit.MILLISECONDS)
                    .subscribe {
                    // For some reason arduino needs to pad with 2 numbers
                    if (it.state) {
                        arduino.send("0;0;2;${it.temperature};".toByteArray())
                    } else {
                        arduino.send("0;0;1;0;".toByteArray())
                    }
                    Log.i(log, "Arduino Sending $it")
                })
                updateThermostat(true)
            }

            override fun onUsbPermissionDenied() {
                Log.i(log, "Arduino Openeds")
                arduino.reopen()
            }

        })
    }
}
I decided to re-use the Processing sketch I have made at the beginning of the semester and build off it for my final project. I realized I really appreciated the possibility for interactive experiences of Processing. I thought it would be a steep but rewarding learning curve to utilize an Xbox360 kinect to enhance the interactive aspect of my sketch.
I have always loved interactive design and projections. I wondered how one might create a projection that others can interact and have fun with because I personally really like the idea of a viewer becoming an essential factor of a projection, and I like the idea of being able to influence and be influenced by one’s environment in such way. I specifically remember seeing the piece “Being Not Truthful Always Works Against Me” by Stefan Sagmeister and Ralph Ammer at the Art Institute several times and how it made me feel/wonder how such projections are made. “Being Not Truthful Always Works Against Me” is “is comprised of those words digitally woven into a projected spiderweb. As a viewer passes in front of the work, a sensor captures the movement, and the web begins to break down, resulting in its eventual destruction and dissolution. However, when the viewer has gone, the web reconstructs itself time and again, playfully mimicking the regenerating power of an actual spider through digital means” (Art Institute of Chicago).
My idea stemmed from a long afternoon of Instagram research on interactive art. From that “Instagram research” I discovered the existence of node-based programs that allow people to create interactive projections. TouchDesigned specifically caught my attention because I really appreciated what people have created with it; I thought the work was very visually appealing. I learned that similar projects can be completed using Processing and an Xbox Kinect, which is something I never expected a gaming device to be used for (art of that sort).
I wanted to essentially make a more complex version of my Processing sketch; I thought that instead of the sketch reacting to mouseX and mouseY coordinates, it reacts in a similar way by reading the proximity and movement of the viewer. My intention for the projection was to make it aesthetically pleasing and interactive.
I watched Daniel Shiffman’s videos on Processing and Kinect, and it all seemed much simpler than it is. I tried looking up examples of sketches other people have done with the Kinect v1 and Processing and unfortunately found less information about it than I thought I might find. The frustrating aspect of people sharing the visuals they’ve made using both Processing and a Kinect was that a lot of them didn’t post the code for them, which only made learning about how to use the two together more difficult. Another issue was that a lot of the code I did find was compatible with Kinect v2 and not v1. In the end I realized my idea was beyond my capabilities and time frame, so I settled for something simpler (but still rewarding).
Materials
Laptop
Xbox360 Kinect v.1
Processing
Code
import org.openkinect.freenect.; import org.openkinect.processing.;

Kinect kinect;

float ballSize = 5;

float[] depthLookUp = new float[2048];

float minThresh = 10;
 float maxThresh = 700;
 PImage img;

IntList pixelListX;
 IntList pixelListY;
 IntList depthList;

void setup() {
   //size(512, 424);
   size(1024, 968);
   kinect = new Kinect(this);
   kinect.initDepth();
   img = createImage(kinect.width, kinect.height,RGB);
   pixelListX = new IntList(); //initialize Int lists
   pixelListY = new IntList();//""
   depthList = new IntList();//""
 }

void draw() {
   pixelListX.clear();
   pixelListY.clear();
   depthList.clear();
   background(#ff01a2);

img.loadPixels();

int[] depth = kinect.getRawDepth();

for (int x = 0; x < kinect.width; x++) {
     for (int y = 0; y < kinect.height; y++) {
       int offset = x + y*kinect.width;
       int d = depth[offset];

if (d > minThresh && d < maxThresh) {
    img.pixels[offset] = color(255,0,150);
    pixelListX.append(x);
    pixelListY.append(y);
    depthList.append(d);
  } else {
         //img.pixels[offset] = color(); //
       }
     }
   }

   for (int i=0; i < pixelListX.size(); i += 15) {
     fill(#0099f7);
     strokeWeight(0);
     ellipse(pixelListX.get(i) * 2, pixelListY.get(i) * 2, 5, 5);
}
   img.updatePixels();
 }
JoJo was something that came to me over the course of the semester. I wanted to work with a lot of different parts, and really test the limits of the Arduino. I initially wanted to build a robot that would respond to a user in some way, and after playing around with a friend’s Alexa, I decided to try out a voice command module.
Step 1: Set up the voice recognition module. This requires the use of software such as der-Hammer to upload commands via Hex format, which is not possible through the Arduino. This also requires a special port device that does not come with all versions of the module.
Step 2: Set up a basic program to test how your Arduino will respond to voice commands
Step 3: Integrate the display board into the project by sending the responses to the display instead of the serial monitor.
Step 4: set up the wifi shield. First, solder the pins to the shield. Next, attach the shield to the Arduino and test that charge runs through the board correctly. Then, check to see that your previous wiring is unaffected.
Step 5: Set up the server. Create a client and server, utilizing an existing weather API and the system’s time to send a basic reading.
Step 6: Integrate the server with the display board by reacting to the weather to display happy or sad.
Step 7: fully complete the wiring, and integrate the code together.
Step 8: determine which commands will prompt which code to run.
step 9. Create a housing for the project to sit inside.
Reasoning Behind Idea: I’ve always had an interest in “artsy” things and for my final project, I wanted to incorporate my interests and likes and turn it into a project that would have a meaning to me. I’ve always had an appreciation for lost and forgotten things; dandelions are a part of nature that are always overlooked, even though they have an interesting meaning(making wishes). I was also hoping to make something that I would actually like to put up in my room.
if(volts > 0.7) { //volts is the variable defined by the example sketch
digitalWrite(2, HIGH); //capitalization matters
delay(200);
digitalWrite(3, HIGH);
delay(200);
digitalWrite(4, HIGH);
delay(300);
digitalWrite(2, LOW);
digitalWrite(3, LOW);
digitalWrite(4, LOW);
}
}
Step 1: Find the right size of wood and laser cut your desired image. I did a dandelion.
Step 2: After the image has been transferred onto the wood, stain the wood in order to give it more of a classy and contrasty look.
Step 3: Depending on the amount of LED lights you would like to use, drill that exact amount of holes into your wooden board.
Step 4:You will now start with your wiring. Get 16 LED lights and connect each long leg to an 100 resistor.
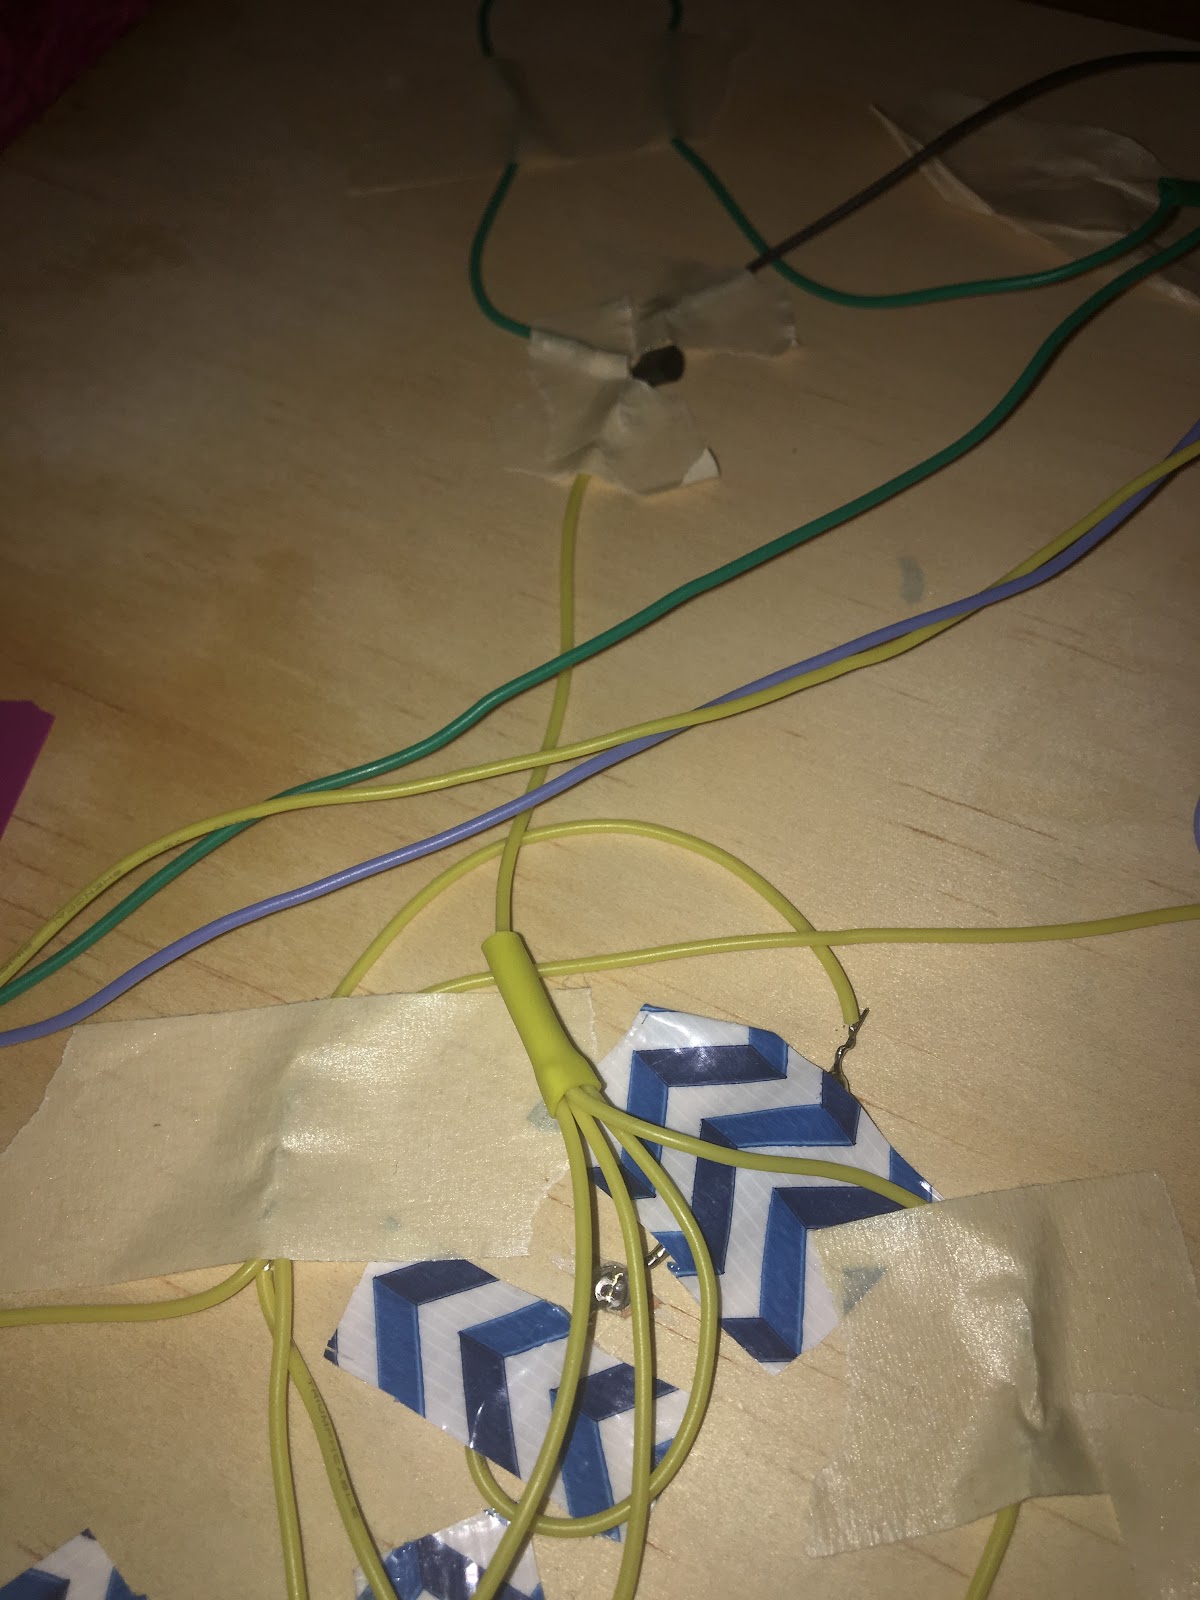
Step 5:Get three transistors and with the flat side facing down connect a black wire to each right side, a green wire to each middle and one of the three different colored wires to the left side.
Step 6:From the one colored strand thats attached to thee transistor, connect 4 more separate strands of the same color. From the end of each, connect your LED and resistor that you connected earlier. Make sure the long side of the resistor is the side connected to the wire(Repeat with the other two).
Step 7:Then connect one more color coordinated wires to each of the four LED lights. Connect the ends of the four wires together(Repeat this with the other two).
Step 8: Connect the remaining three different colored wires together and connect them to 5V in the arduino.
Step 9: The green wires that we connected to the transistors, put one in port 2, one in port 3 and one in port 4.
Step 10: Then, connect all three of the black wires from the transistor together and put it in port GND.
Step 11:Grab a adafruit microphone and connect one wire to GND. From that GND, connect the other end of the wire to the GND on the arduino. Then connect a different colored wire to VCC and connect the end of that wire to 3.3V on the arduino. Lastly, grab another different colored wire and connect it to the OUT on the microphone and lead the end of that wire to the A1 port on the arduino.
For the final project, I want to make a more complete glove, with lights flashing when the hand moves.
I wanted to make a glove when it heard a sound, the light on it would light up. I searched for many Arduino, and finally, I found a very small one called gemma, which could be hidden on the glove. But I don’t know why I couldn’t input the code into gemma. I used a type called flora instead of gemma.
Materials used NeoPixel Arduino Sensor Soldering iron and solder Glove
I made a wall lamp which an ultrasonic sensor. I cut it like a shape of a bull and used 10 white LED lights on the back of phase 1. The sensor detects a movement and turns the lights on. When there is no movement detected for 15 minutes, the lights will be turned off. This may be used near the front door to greet as well as a decoration.
The materials that I used were 0.25inches thick plywoods, ultrasonic sensor, Arduino, and 10 white LED lights. First I made an illustrator file for laser cutting. I made 2 main parts of the bull and since the plywood was too thin, I made 3 sets of each parts and wood glue them together by their parts. Then, I drilled whole like they were nose of the bull and friction fitted the sensor. After making the basic shapes of the whole prototype, I moved on to connecting the sensors and the lights. Since there were too many lights, especially the white LED lights, I made 5 sets of parallel circuit in order to separate. Now I connected everything with wires and turned the Arduino on to see if it was working or not and it worked. Then I connected all the wires, lights, and sensor by soldering them.
int trigPin = 11; // Trigger
int echoPin = 12; // Echo
long duration, cm, inches;
int LED1 = 2;
int LED2 = 3;
int LED3 = 4;
int LED4 = 5;
int LED5 = 6;
//time variables
unsigned long time;
unsigned long timeFinish;
unsigned long timelength = 900000; //15 minutes
void setup() {
//Serial Port begin
Serial.begin (9600);
//Define inputs and outputs
pinMode(trigPin, OUTPUT);
pinMode(echoPin, INPUT);
pinMode(LED1, OUTPUT);
pinMode(LED2, OUTPUT);
pinMode(LED3, OUTPUT);
pinMode(LED4, OUTPUT);
pinMode(LED5, OUTPUT);
}
void loop() {
time = millis();
// The sensor is triggered by a HIGH pulse of 10 or more microseconds.
// Give a short LOW pulse beforehand to ensure a clean HIGH pulse:
digitalWrite(trigPin, LOW);
delayMicroseconds(5);
digitalWrite(trigPin, HIGH);
delayMicroseconds(10);
digitalWrite(trigPin, LOW);
// Read the signal from the sensor: a HIGH pulse whose
// duration is the time (in microseconds) from the sending
// of the ping to the reception of its echo off of an object.
pinMode(echoPin, INPUT);
duration = pulseIn(echoPin, HIGH);
// Convert the time into a distance
cm = (duration/2) / 29.1; // Divide by 29.1 or multiply by 0.0343
inches = (duration/2) / 74; // Divide by 74 or multiply by 0.0135
For my final project, I decided to create a game using Processing and sensors for the Arduino. In this game, the player must test the different sensors to see how different actions manipulate the shapes on the screen to reveal the 4 numbers hidden underneath. The player then must enter those numbers into the keypad in the correct order to win the game. This game is best played with two people playing on their own separate machines/using their own Arduinos and seeing who can beat the level first. I was able to implement two different levels, but the game is easily buildable using the framework I wrote. The sensors I used are the Ultrasonic Sensor and the Touch Sensor (MPR121).
Materials Used
Arduino Uno
Breadboard
Jumper Wires
Ultrasonic Sensor
MPR121 Sensor
4X4 Keypad
Processing 3.0+
The different sensors/attachments I used. (From left to right: Ultrasonic Sensor, 4X4 Keypad, MPR121 Sensor)
Step One: Gather Your Materials
To build the game, you can use any sensors you would like. I ended up choosing the Ultrasonic Sesnor and the MCR121 Touch Sensor. You will also need a keypad. I used the 4X4 one we had in our kit.
Everything after being all set up and ready to use.
Step Two: Set Up Your Sensors
The next step is to set up all of your sensor on your breadboard. Make sure they have enough distance so you can easily interact with each without having to touch another one.
The start-up screen
The instructions
Step Three: Set Up Your GUI Start Up Screen
My first step in creating my game was finding and implementing a GUI. I chose to use the ControlP5 library. From there I began to create my start up screen. Here, the user can choose to either start the game or read how to play. When the player presses start, the function for the start button will then pull either the first or second level, then brings up the game play screen.
One of the levels in the game upon startup.
The level while utilizing the Ultrasonic Sensor.
Step Four: Design Your Levels
Now it’s time for the fun to begin! That is, if working with the Arduino and Processing talking to each other is your idea of fun. In this level example, the level starts with 50 randomly generated triangles covering the 4 numbers. Now we get to decide how the sensors will manipulate these triangles. I chose for the Ultrasonic Sensor to manipulate the opacity of the triangles, and the touch sensor moves the triangles around. The player is not told what each sensor does and have to figure it out for themselves, which is part of the fun of the game.
Step Five: Reward The Player with a Winning Message (Optional)
After the player has entered the code correctly, you can choose to reward them with a winning message, as above. Or you could leave them hanging forever, not knowing if they have won or not and have them enter different combinations of the four digits until the end of time, completely up to you.
Game in Action
Arduino Code
#include <Keypad.h>
#include <Wire.h>
#include "Adafruit_MPR121.h"

// Ultrasonic //
int trigPin = 11;    // Trigger
int echoPin = 12;    // Echo
int duration;

// Keypad //
const byte ROWS = 4;
const byte COLS = 4;
char hexaKeys[ROWS][COLS] = {
  {'1', '2', '3', 'A'},
  {'4', '5', '6', 'B'},
  {'7', '8', '9', 'C'},
  {'*', '0', '#', 'D'}
};
byte rowPins[ROWS] = {9, 8, 7, 6};
byte colPins[COLS] = {5, 4, 3, 2};


// Touch Sensor //
#ifndef _BV
#define _BV(bit) (1 << (bit))
#endif
// Keeps track of the last pins touched
// so we know when buttons are 'released'
uint16_t lasttouched = 0;
uint16_t currtouched = 0;

Adafruit_MPR121 cap = Adafruit_MPR121();
Keypad customKeypad = Keypad(makeKeymap(hexaKeys), rowPins, colPins, ROWS, COLS);

void setup()
{
  //initialize serial communications at a 9600 baud rate
  Serial.begin(9600);

  //Define inputs and outputs for Ultrasonic
  pinMode(trigPin, OUTPUT);
  pinMode(echoPin, INPUT);


  // Touch Sensor
  while (!Serial) { // needed to keep leonardo/micro from starting too fast!
    delay(10);
  }

   if (!cap.begin(0x5A)) {
    Serial.println("MPR121 not found, check wiring?");
    while (1);
  }
  //Serial.println("MPR121 found!");
}

void loop()
{
  // Keyboard
  char customKey = customKeypad.getKey();

  if (customKey){
    Serial.println(customKey);
    delay(100);
  }
  else if (cap.touched()) {
    // Touch Sensor
    currtouched = cap.touched();

    for (uint8_t i=0; i<12; i++) {
      // it if *is* touched and *wasnt* touched before, alert!
      if ((currtouched & _BV(i)) && !(lasttouched & _BV(i)) ) {
      }

      // if it *was* touched and now *isnt*, alert!
      if (!(currtouched & _BV(i)) && (lasttouched & _BV(i)) ) {
        Serial.print(String(i + 10) + '\n');
      }
    }

    // reset our state
    lasttouched = currtouched;
  }
  else {
    // The sensor is triggered by a HIGH pulse of 10 or more microseconds.
    // Give a short LOW pulse beforehand to ensure a clean HIGH pulse:
    digitalWrite(trigPin, LOW);
    delayMicroseconds(5);
    digitalWrite(trigPin, HIGH);
    delayMicroseconds(10);
    digitalWrite(trigPin, LOW);

    // Read the signal from the sensor: a HIGH pulse whose
    // duration is the time (in microseconds) from the sending
    // of the ping to the reception of its echo off of an object.
    pinMode(echoPin, INPUT);
    duration = pulseIn(echoPin, HIGH);

    // Convert the time into a distance
    //cm = (duration/2) / 29.1;     // Divide by 29.1 or multiply by 0.0343
    //inches = (duration/2) / 74;   // Divide by 74 or multiply by 0.0135

    Serial.println(duration);
    delay(250);
  }
}
Processing Code
import processing.serial.*;
Serial myPort;  // Create object from Serial class
String val;     // Data received from the serial port

// init P5s
import controlP5.*;
ControlP5 controlP5;
ControlP5 instr;

// font
PFont font;

// images
PImage a1;
PImage a2;
PImage a3;

// colors
color purple = color(151, 32, 211);
color purple_1 = color(151, 32, 211, 225);
color purple_2 = color(151, 32, 211, 150);
color purple_3 = color(151, 32, 211, 75);
color purple_4 = color(151, 32, 211, 25);
color white = color(249, 247, 250);
color white_1 = color(249, 247, 250, 225);
color white_2 = color(249, 247, 250, 150);
color white_3 = color(249, 247, 250, 75);
color white_4 = color(249, 247, 250, 25);
color yellow = color(228, 234, 69);
color yellow_1 = color(228, 234, 69, 225);
color yellow_2 = color(228, 234, 69, 150);
color yellow_3 = color(228, 234, 69, 60);
color yellow_4 = color(228, 234, 69, 10);

// color 2
color lightblue = color(161, 179, 245);
color peach = color(245, 185, 161);
color pink = color(245, 161, 193);

// buttons
Button b1;
Button b2;
Button back;

// init the code position variables
int p1, p2, p3, p4, p5, p6, p7, p8;

// init prev_val for keypad control
int prev_val = 0;

// init shapes
PShape t1,
t2,
t3,
t4,
t5,
t6,
t7,
t8,
t9,
t10,
t11,
t12,
t13,
t14,
t15,
t16,
t17,
t18,
t19,
t20,
t21,
t22,
t23,
t24,
t25,
t26,
t27,
t28,
t29,
t30,
t31,
t32,
t33,
t34,
t35,
t36,
t37,
t38,
t39,
t40,
t41,
t42,
t43,
t44,
t45,
t46,
t47,
t48,
t49,
t50;


// init r g b
int r = 0;
int g = 0;
int b = 0;

// init the init variables
int gameStart = 0;
int winStart = 0;
int instrStart = 0;
int state = 0;

// init the code Integers
Integer c1;
Integer c2;
Integer c3;
Integer c4;

// init ArrayLists
ArrayList<PShape> triArr = new ArrayList<PShape>();
ArrayList<Integer> codeArr = new ArrayList<Integer>();
ArrayList<Integer> guess = new ArrayList<Integer>();

void setup() {
  size(800, 800);
  a1 = loadImage("a1.png");
  a2 = loadImage("a2.png");
  a3 = loadImage("a3.png");
  controlP5 = new ControlP5(this);
  instr = new ControlP5(this);
  b1 = new Button(controlP5, "Start").setBroadcast(false).setValue(255).setPosition(150,400).setSize(200,50);
  b2 = new Button(controlP5, "Instructions").setBroadcast(false).setValue(0).setPosition(450,400).setSize(200,50);
  back = new Button(instr, "Back").setBroadcast(false).setValue(255).setPosition(300,600).setSize(200,50);
  String portName = Serial.list()[0]; //change the 0 to a 1 or 2 etc. to match your port
  myPort = new Serial(this, portName, 9600);
}

void draw() {
  if ( myPort.available() > 0)
  {  // If data is available,
  val = myPort.readStringUntil('\n');         // read it and store it in val
  }

  if (state == 0) {
    menu();
  }
  else if (state == 1) {
    startGame1(val);
  }
  else if(state == 2) {
    startGame2(val);
  }
  else if (state == 3) {
    getWin();
  }
  else if (state == 4) {
    getInstructions();
  }
}

// button actions
public void Start(){
    int rand = int(random(0, 3));
    if (rand%2 == 0) state = 1;
    else state = 2;
}
public void Instructions(){
  state = 4;
}
public void Back() {
  state = 0;
  instrStart = 0;
}

////////////////////////////////////////////////////////////////////////////////////////
// Menu //
void menu() {
  frameRate(10);
  b1.show();
  b2.show();
  back.hide();
  background(r, g, b);
  // images
  a1.resize(50, 0);
  a2.resize(50, 0);
  a3.resize(50, 0);
  for (int i = 0; i < 20; i++) {
    image(a1, int(random(0, 801)), int(random(0, 801)));
  }
  for (int i = 0; i < 20; i++) {
    image(a2, int(random(0, 801)), int(random(0, 801)));
  }
  for (int i = 0; i < 20; i++) {
    image(a3, int(random(0, 801)), int(random(0, 801)));
  }

  // title
  font = loadFont("OCRAStd-48.vlw");
  textFont(font);
  text("Arduino Sensor Game", 75, 200);

  b1.setBroadcast(true);
  b2.setBroadcast(true);
}
//////////////////////////////////////////////////////////////////////////////////////////////////////////////
// First Level //
void startGame1(String val) {
    // init game
    if (gameStart == 0) {
      initGame1();
    }

    // reset shapes each time
    clearTri();

    try {

      // parse the val
      val = val.trim();
      int val_int = Integer.parseInt(val);

      // Sensor Actions //
      // Keypad //
      if (val_int < 10) {

        if (val_int == prev_val) {
          // do nothing
        }
        else {

          if (guess.size() != 4) {
            guess.add(val_int);
          }

          println(guess);

          if (guess.size() == 4) {
            int counter = 0;
            int winCounter = 0;
            for (Integer i : guess) {
              if (codeArr.get(counter).equals(i)) {
                winCounter++;
              }
              counter++;
            }

            if (winCounter == 4) {
              state = 3;
              guess.clear();
            }
            else {
              println("That's not it, try again");
              guess.clear();
            }
          }
        }
      }

      else if (val_int < 22) {
        if (val_int < 16) {
          for(PShape t : triArr) {
            t.translate(random(0, 101), random(0, 101));
          }
        }
         else {
           for(PShape t : triArr) {
            t.translate(random(-100, 1), random(-100, 1));
           }
         }
      }

     else {

       if (val_int < 300) {
         int counter = 0;
         color c;

         for (PShape t : triArr) {
           if (counter%3 == 0) c = purple_4;
           else if (counter%3 == 1) c = white_4;
           else c = yellow_4;

           t.setFill(c);
           shape(t);

           counter++;
         }
       }
       else if (val_int < 400) {
         int counter = 0;
         color c;

         for (PShape t : triArr) {
           if (counter%3 == 0) c = purple_3;
           else if (counter%3 == 1) c = white_3;
           else c = yellow_3;

           t.setFill(c);
           shape(t);

           counter++;
         }
       }
       else if (val_int < 600) {
         int counter = 0;
         color c;

         for (PShape t : triArr) {
           if (counter%3 == 0) c = purple_2;
           else if (counter%3 == 1) c = white_2;
           else c = yellow_2;

           t.setFill(c);
           shape(t);

           counter++;
         }
       }
       else if (val_int < 800) {
         int counter = 0;
         color c;

         for (PShape t : triArr) {
           if (counter%3 == 0) c = purple_1;
           else if (counter%3 == 1) c = white_1;
           else c = yellow_1;

           t.setFill(c);
           shape(t);

           counter++;
         }
       }
       else {
         int counter = 0;
          color c;
          for(PShape t : triArr){
            if (counter%3 == 0) c = purple;
            else if (counter%3 == 1) c = white;
            else c = yellow;

            t.setFill(c);
            shape(t);

            counter++;
          }
     }
   }
   prev_val = val_int;
  }
  catch (Exception e) {
    int colorCount = 0;
        color c;
        for(PShape t : triArr){
          if (colorCount%3 == 0) c = purple;
          else if (colorCount%3 == 1) c = white;
          else c = yellow;

          t.setFill(c);
          shape(t);

          colorCount++;
        }
  }
}

///////////////////////////////////////////////////////////////////////////////////////////////////////////////////
// Init First Level //
void initGame1() {
  size(800, 800);
  background(r, g, b);
  controlP5.remove("Start");
  controlP5.remove("Instructions");

  a3.resize(20, 0);
  for (int i = 0; i < 100; i++) {
    image(a3, int(random(0, 801)), int(random(0, 801)));
  }

  // set up game
  c1 = int(random(1, 10));
  c2 = int(random(1, 10));
  c3 = int(random(1, 10));
  c4 = int(random(1, 10));

  codeArr.add(c1);
  codeArr.add(c2);
  codeArr.add(c3);
  codeArr.add(c4);

  p1 = int(random(10, 790));
  p2 = int(random(10, 790));
  p3 = int(random(10, 790));
  p4 = int(random(10, 790));
  p5 = int(random(10, 790));
  p6 = int(random(10, 790));
  p7 = int(random(10, 790));
  p8 = int(random(10, 790));

  // text
  font = loadFont("OCRAStd-30.vlw");
  text(c1, p1, p2);
  text(c2, p3, p4);
  text(c3, p5, p6);
  text(c4, p7, p8);

  // shapes
  t1 = createShape(TRIANGLE, int(random(0, 801)), int(random(0, 801)), int(random(0, 801)), int(random(0, 801)), int(random(0, 801)), int(random(0, 801)));
  triArr.add(t1);
  t2 = createShape(TRIANGLE, int(random(0, 801)), int(random(0, 801)), int(random(0, 801)), int(random(0, 801)), int(random(0, 801)), int(random(0, 801)));
  triArr.add(t2);
  t3 = createShape(TRIANGLE, int(random(0, 801)), int(random(0, 801)), int(random(0, 801)), int(random(0, 801)), int(random(0, 801)), int(random(0, 801)));
  triArr.add(t3);
  t4 = createShape(TRIANGLE, int(random(0, 801)), int(random(0, 801)), int(random(0, 801)), int(random(0, 801)), int(random(0, 801)), int(random(0, 801)));
  triArr.add(t4);
  t5 = createShape(TRIANGLE, int(random(0, 801)), int(random(0, 801)), int(random(0, 801)), int(random(0, 801)), int(random(0, 801)), int(random(0, 801)));
  triArr.add(t5);
  t6 = createShape(TRIANGLE, int(random(0, 801)), int(random(0, 801)), int(random(0, 801)), int(random(0, 801)), int(random(0, 801)), int(random(0, 801)));
  triArr.add(t6);
  t7 = createShape(TRIANGLE, int(random(0, 801)), int(random(0, 801)), int(random(0, 801)), int(random(0, 801)), int(random(0, 801)), int(random(0, 801)));
  triArr.add(t7);
  t8 = createShape(TRIANGLE, int(random(0, 801)), int(random(0, 801)), int(random(0, 801)), int(random(0, 801)), int(random(0, 801)), int(random(0, 801)));
  triArr.add(t8);
  t9 = createShape(TRIANGLE, int(random(0, 801)), int(random(0, 801)), int(random(0, 801)), int(random(0, 801)), int(random(0, 801)), int(random(0, 801)));
  triArr.add(t9);
  t10 = createShape(TRIANGLE, int(random(0, 801)), int(random(0, 801)), int(random(0, 801)), int(random(0, 801)), int(random(0, 801)), int(random(0, 801)));
  triArr.add(t10);
  t11 = createShape(TRIANGLE, int(random(0, 801)), int(random(0, 801)), int(random(0, 801)), int(random(0, 801)), int(random(0, 801)), int(random(0, 801)));
  triArr.add(t11);
  t12 = createShape(TRIANGLE, int(random(0, 801)), int(random(0, 801)), int(random(0, 801)), int(random(0, 801)), int(random(0, 801)), int(random(0, 801)));
  triArr.add(t12);
  t13 = createShape(TRIANGLE, int(random(0, 801)), int(random(0, 801)), int(random(0, 801)), int(random(0, 801)), int(random(0, 801)), int(random(0, 801)));
  triArr.add(t13);
  t14 = createShape(TRIANGLE, int(random(0, 801)), int(random(0, 801)), int(random(0, 801)), int(random(0, 801)), int(random(0, 801)), int(random(0, 801)));
  triArr.add(t14);
  t15 = createShape(TRIANGLE, int(random(0, 801)), int(random(0, 801)), int(random(0, 801)), int(random(0, 801)), int(random(0, 801)), int(random(0, 801)));
  triArr.add(t15);
  t16 = createShape(TRIANGLE, int(random(0, 801)), int(random(0, 801)), int(random(0, 801)), int(random(0, 801)), int(random(0, 801)), int(random(0, 801)));
  triArr.add(t16);
  t17 = createShape(TRIANGLE, int(random(0, 801)), int(random(0, 801)), int(random(0, 801)), int(random(0, 801)), int(random(0, 801)), int(random(0, 801)));
  triArr.add(t17);
  t18 = createShape(TRIANGLE, int(random(0, 801)), int(random(0, 801)), int(random(0, 801)), int(random(0, 801)), int(random(0, 801)), int(random(0, 801)));
  triArr.add(t18);
  t19 = createShape(TRIANGLE, int(random(0, 801)), int(random(0, 801)), int(random(0, 801)), int(random(0, 801)), int(random(0, 801)), int(random(0, 801)));
  triArr.add(t19);
  t20 = createShape(TRIANGLE, int(random(0, 801)), int(random(0, 801)), int(random(0, 801)), int(random(0, 801)), int(random(0, 801)), int(random(0, 801)));
  triArr.add(t20);
  t21 = createShape(TRIANGLE, int(random(0, 801)), int(random(0, 801)), int(random(0, 801)), int(random(0, 801)), int(random(0, 801)), int(random(0, 801)));
  triArr.add(t21);
  t22 = createShape(TRIANGLE, int(random(0, 801)), int(random(0, 801)), int(random(0, 801)), int(random(0, 801)), int(random(0, 801)), int(random(0, 801)));
  triArr.add(t22);
  t23 = createShape(TRIANGLE, int(random(0, 801)), int(random(0, 801)), int(random(0, 801)), int(random(0, 801)), int(random(0, 801)), int(random(0, 801)));
  triArr.add(t23);
  t24 = createShape(TRIANGLE, int(random(0, 801)), int(random(0, 801)), int(random(0, 801)), int(random(0, 801)), int(random(0, 801)), int(random(0, 801)));
  triArr.add(t24);
  t25 = createShape(TRIANGLE, int(random(0, 801)), int(random(0, 801)), int(random(0, 801)), int(random(0, 801)), int(random(0, 801)), int(random(0, 801)));
  triArr.add(t25);
  t26 = createShape(TRIANGLE, int(random(0, 801)), int(random(0, 801)), int(random(0, 801)), int(random(0, 801)), int(random(0, 801)), int(random(0, 801)));
  triArr.add(t26);
  t27 = createShape(TRIANGLE, int(random(0, 801)), int(random(0, 801)), int(random(0, 801)), int(random(0, 801)), int(random(0, 801)), int(random(0, 801)));
  triArr.add(t27);
  t28 = createShape(TRIANGLE, int(random(0, 801)), int(random(0, 801)), int(random(0, 801)), int(random(0, 801)), int(random(0, 801)), int(random(0, 801)));
  triArr.add(t28);
  t29 = createShape(TRIANGLE, int(random(0, 801)), int(random(0, 801)), int(random(0, 801)), int(random(0, 801)), int(random(0, 801)), int(random(0, 801)));
  triArr.add(t29);
  t30 = createShape(TRIANGLE, int(random(0, 801)), int(random(0, 801)), int(random(0, 801)), int(random(0, 801)), int(random(0, 801)), int(random(0, 801)));
  triArr.add(t30);
  t31 = createShape(TRIANGLE, int(random(0, 801)), int(random(0, 801)), int(random(0, 801)), int(random(0, 801)), int(random(0, 801)), int(random(0, 801)));
  triArr.add(t31);
  t32 = createShape(TRIANGLE, int(random(0, 801)), int(random(0, 801)), int(random(0, 801)), int(random(0, 801)), int(random(0, 801)), int(random(0, 801)));
  triArr.add(t32);
  t33 = createShape(TRIANGLE, int(random(0, 801)), int(random(0, 801)), int(random(0, 801)), int(random(0, 801)), int(random(0, 801)), int(random(0, 801)));
  triArr.add(t33);
  t34 = createShape(TRIANGLE, int(random(0, 801)), int(random(0, 801)), int(random(0, 801)), int(random(0, 801)), int(random(0, 801)), int(random(0, 801)));
  triArr.add(t34);
  t35 = createShape(TRIANGLE, int(random(0, 801)), int(random(0, 801)), int(random(0, 801)), int(random(0, 801)), int(random(0, 801)), int(random(0, 801)));
  triArr.add(t35);
  t36 = createShape(TRIANGLE, int(random(0, 801)), int(random(0, 801)), int(random(0, 801)), int(random(0, 801)), int(random(0, 801)), int(random(0, 801)));
  triArr.add(t36);
  t37 = createShape(TRIANGLE, int(random(0, 801)), int(random(0, 801)), int(random(0, 801)), int(random(0, 801)), int(random(0, 801)), int(random(0, 801)));
  triArr.add(t37);
  t38 = createShape(TRIANGLE, int(random(0, 801)), int(random(0, 801)), int(random(0, 801)), int(random(0, 801)), int(random(0, 801)), int(random(0, 801)));
  triArr.add(t38);
  t39 = createShape(TRIANGLE, int(random(0, 801)), int(random(0, 801)), int(random(0, 801)), int(random(0, 801)), int(random(0, 801)), int(random(0, 801)));
  triArr.add(t39);
  t40 = createShape(TRIANGLE, int(random(0, 801)), int(random(0, 801)), int(random(0, 801)), int(random(0, 801)), int(random(0, 801)), int(random(0, 801)));
  triArr.add(t40);
  t41 = createShape(TRIANGLE, int(random(0, 801)), int(random(0, 801)), int(random(0, 801)), int(random(0, 801)), int(random(0, 801)), int(random(0, 801)));
  triArr.add(t41);
  t42 = createShape(TRIANGLE, int(random(0, 801)), int(random(0, 801)), int(random(0, 801)), int(random(0, 801)), int(random(0, 801)), int(random(0, 801)));
  triArr.add(t42);
  t43 = createShape(TRIANGLE, int(random(0, 801)), int(random(0, 801)), int(random(0, 801)), int(random(0, 801)), int(random(0, 801)), int(random(0, 801)));
  triArr.add(t43);
  t44 = createShape(TRIANGLE, int(random(0, 801)), int(random(0, 801)), int(random(0, 801)), int(random(0, 801)), int(random(0, 801)), int(random(0, 801)));
  triArr.add(t44);
  t45 = createShape(TRIANGLE, int(random(0, 801)), int(random(0, 801)), int(random(0, 801)), int(random(0, 801)), int(random(0, 801)), int(random(0, 801)));
  triArr.add(t45);
  t46 = createShape(TRIANGLE, int(random(0, 801)), int(random(0, 801)), int(random(0, 801)), int(random(0, 801)), int(random(0, 801)), int(random(0, 801)));
  triArr.add(t46);
  t47 = createShape(TRIANGLE, int(random(0, 801)), int(random(0, 801)), int(random(0, 801)), int(random(0, 801)), int(random(0, 801)), int(random(0, 801)));
  triArr.add(t47);
  t48 = createShape(TRIANGLE, int(random(0, 801)), int(random(0, 801)), int(random(0, 801)), int(random(0, 801)), int(random(0, 801)), int(random(0, 801)));
  triArr.add(t48);
  t49 = createShape(TRIANGLE, int(random(0, 801)), int(random(0, 801)), int(random(0, 801)), int(random(0, 801)), int(random(0, 801)), int(random(0, 801)));
  triArr.add(t49);
  t50 = createShape(TRIANGLE, int(random(0, 801)), int(random(0, 801)), int(random(0, 801)), int(random(0, 801)), int(random(0, 801)), int(random(0, 801)));
  triArr.add(t50);

  // uncomment to reveal winning code in terminal upon game startup
  //println(codeArr);
  gameStart = 1;

}
///////////////////////////////////////////////////////////////////////////////////////////////////////////////
// Reset First Level SO Shapes Can Change Correctly //
void clearTri() {
  background(0);

  a1.resize(20, 0);
  a2.resize(20, 0);
  a3.resize(20, 0);
  for (int i = 0; i < 100; i++) {
    image(a1, int(random(0, 801)), int(random(0, 801)));
  }
  for (int i = 0; i < 100; i++) {
    image(a2, int(random(0, 801)), int(random(0, 801)));
  }
  for (int i = 0; i < 100; i++) {
    image(a3, int(random(0, 801)), int(random(0, 801)));
  }
  // text
  font = loadFont("OCRAStd-30.vlw");
  text(c1, p1, p2);
  text(c2, p3, p4);
  text(c3, p5, p6);
  text(c4, p7, p8);
}
//////////////////////////////////////////////////////////////////////////////////////////////////////////////////
// Second Level //
void startGame2(String val) {
    if (gameStart == 0) {
      initGame2();
    }

    // reset level
    clearEllipse();

    try {
      val = val.trim();
      int val_int = Integer.parseInt(val);
      if (val_int < 10) {

        if (val_int == prev_val) {
          // do nothing
        }
        else {

        if (guess.size() != 4) {
          guess.add(val_int);
        }

        println(guess);

        if (guess.size() == 4) {
          int counter = 0;
          int winCounter = 0;
          for (Integer i : guess) {
            if (codeArr.get(counter).equals(i)) {
              winCounter++;
            }
            counter++;
          }

          if (winCounter == 4) {
            state = 3;
            guess.clear();
          }
          else {
            println("That's not it, try again");
            guess.clear();
          }
       }
     }
   }

      else if (val_int < 22) {
        if (val_int < 16) {
          for(PShape t : triArr) {
           int counter = 0;
           if (counter%2 == 1) {
             t.scale(1.01);
           }
           shape(t);
           counter++;
         }
        }
        else {
          int counter = 0;
         for (PShape t : triArr) {
           if (counter%2 == 0) {
             t.scale(.985);
           }
           shape(t);
           counter++;
         }
        }
      }

     else {
       if (val_int > 400) {
         int counter = 0;
         for (PShape t : triArr) {
           if (counter%2 == 1) {
             t.scale(1.05);
           }
           else t.scale(1.01);
           shape(t);
           counter++;
         }
       }
       else {
         for(PShape t : triArr) {
           int counter = 0;
           if (counter%2 == 0) {
             t.scale(0.90);
           }
           else t.scale(0.87);
           shape(t);
           counter++;
         }
       }
     }
     prev_val = val_int;
    }
    catch (Exception e) {
      int colorCount = 0;
          color c;
          for(PShape t : triArr){
            if (colorCount%3 == 0) c = lightblue;
            else if (colorCount%3 == 1) c = peach;
            else c = pink;

            t.setFill(c);
            shape(t);

            colorCount++;
          }
      }
  }
//////////////////////////////////////////////////////////////////////////////////////////////////////////////////
// Init Second Level //
void initGame2() {
  size(800, 800);
  background(r, g, b);
  controlP5.remove("Start");
  controlP5.remove("Instructions");

  a3.resize(20, 0);
  for (int i = 0; i < 100; i++) {
    image(a3, int(random(0, 801)), int(random(0, 801)));
  }

  // set up game
  c1 = int(random(1, 10));
  c2 = int(random(1, 10));
  c3 = int(random(1, 10));
  c4 = int(random(1, 10));

  codeArr.add(c1);
  codeArr.add(c2);
  codeArr.add(c3);
  codeArr.add(c4);

  p1 = int(random(10, 790));
  p2 = int(random(10, 790));
  p3 = int(random(10, 790));
  p4 = int(random(10, 790));
  p5 = int(random(10, 790));
  p6 = int(random(10, 790));
  p7 = int(random(10, 790));
  p8 = int(random(10, 790));

  // text
  font = loadFont("OCRAStd-30.vlw");
  text(c1, p1, p2);
  text(c2, p3, p4);
  text(c3, p5, p6);
  text(c4, p7, p8);

  // shapes
  t1 = createShape(ELLIPSE, int(random(0, 801)), int(random(0, 801)), int(random(0, 801)), int(random(0, 801)));
  triArr.add(t1);
  t2 = createShape(ELLIPSE, int(random(0, 801)), int(random(0, 801)), int(random(0, 801)), int(random(0, 801)));
  triArr.add(t2);
  t3 = createShape(ELLIPSE, int(random(0, 801)), int(random(0, 801)), int(random(0, 801)), int(random(0, 801)));
  triArr.add(t3);
  t4 = createShape(ELLIPSE, int(random(0, 801)), int(random(0, 801)), int(random(0, 801)), int(random(0, 801)));
  triArr.add(t4);
  t5 = createShape(ELLIPSE, int(random(0, 801)), int(random(0, 801)), int(random(0, 801)), int(random(0, 801)));
  triArr.add(t5);
  t6 = createShape(ELLIPSE, int(random(0, 801)), int(random(0, 801)), int(random(0, 801)), int(random(0, 801)));
  triArr.add(t6);
  t7 = createShape(ELLIPSE, int(random(0, 801)), int(random(0, 801)), int(random(0, 801)), int(random(0, 801)));
  triArr.add(t7);
  t8 = createShape(ELLIPSE, int(random(0, 801)), int(random(0, 801)), int(random(0, 801)), int(random(0, 801)));
  triArr.add(t8);
  t9 = createShape(ELLIPSE, int(random(0, 801)), int(random(0, 801)), int(random(0, 801)), int(random(0, 801)));
  triArr.add(t9);
  t10 = createShape(ELLIPSE, int(random(0, 801)), int(random(0, 801)), int(random(0, 801)), int(random(0, 801)));
  triArr.add(t10);
  t11 = createShape(ELLIPSE, int(random(0, 801)), int(random(0, 801)), int(random(0, 801)), int(random(0, 801)));
  triArr.add(t11);
  t12 = createShape(ELLIPSE, int(random(0, 801)), int(random(0, 801)), int(random(0, 801)), int(random(0, 801)));
  triArr.add(t12);
  t13 = createShape(ELLIPSE, int(random(0, 801)), int(random(0, 801)), int(random(0, 801)), int(random(0, 801)));
  triArr.add(t13);
  t14 = createShape(ELLIPSE, int(random(0, 801)), int(random(0, 801)), int(random(0, 801)), int(random(0, 801)));
  triArr.add(t14);
  t15 = createShape(ELLIPSE, int(random(0, 801)), int(random(0, 801)), int(random(0, 801)), int(random(0, 801)));
  triArr.add(t15);
  t16 = createShape(ELLIPSE, int(random(0, 801)), int(random(0, 801)), int(random(0, 801)), int(random(0, 801)));
  triArr.add(t16);
  t17 = createShape(ELLIPSE, int(random(0, 801)), int(random(0, 801)), int(random(0, 801)), int(random(0, 801)));
  triArr.add(t17);
  t18 = createShape(ELLIPSE, int(random(0, 801)), int(random(0, 801)), int(random(0, 801)), int(random(0, 801)));
  triArr.add(t18);
  t19 = createShape(ELLIPSE, int(random(0, 801)), int(random(0, 801)), int(random(0, 801)), int(random(0, 801)));
  triArr.add(t19);
  t20 = createShape(ELLIPSE, int(random(0, 801)), int(random(0, 801)), int(random(0, 801)), int(random(0, 801)));
  triArr.add(t20);
  t21 = createShape(ELLIPSE, int(random(0, 801)), int(random(0, 801)), int(random(0, 801)), int(random(0, 801)));
  triArr.add(t21);
  t22 = createShape(ELLIPSE, int(random(0, 801)), int(random(0, 801)), int(random(0, 801)), int(random(0, 801)));
  triArr.add(t22);
  t23 = createShape(ELLIPSE, int(random(0, 801)), int(random(0, 801)), int(random(0, 801)), int(random(0, 801)));
  triArr.add(t23);
  t24 = createShape(ELLIPSE, int(random(0, 801)), int(random(0, 801)), int(random(0, 801)), int(random(0, 801)));
  triArr.add(t24);
  t25 = createShape(ELLIPSE, int(random(0, 801)), int(random(0, 801)), int(random(0, 801)), int(random(0, 801)));
  triArr.add(t25);
  t26 = createShape(ELLIPSE, int(random(0, 801)), int(random(0, 801)), int(random(0, 801)), int(random(0, 801)));
  triArr.add(t26);
  t27 = createShape(ELLIPSE, int(random(0, 801)), int(random(0, 801)), int(random(0, 801)), int(random(0, 801)));
  triArr.add(t27);
  t28 = createShape(ELLIPSE, int(random(0, 801)), int(random(0, 801)), int(random(0, 801)), int(random(0, 801)));
  triArr.add(t28);
  t29 = createShape(ELLIPSE, int(random(0, 801)), int(random(0, 801)), int(random(0, 801)), int(random(0, 801)));
  triArr.add(t29);
  t30 = createShape(ELLIPSE, int(random(0, 801)), int(random(0, 801)), int(random(0, 801)), int(random(0, 801)));
  triArr.add(t30);
  t31 = createShape(ELLIPSE, int(random(0, 801)), int(random(0, 801)), int(random(0, 801)), int(random(0, 801)));
  triArr.add(t31);
  t32 = createShape(ELLIPSE, int(random(0, 801)), int(random(0, 801)), int(random(0, 801)), int(random(0, 801)));
  triArr.add(t32);
  t33 = createShape(ELLIPSE, int(random(0, 801)), int(random(0, 801)), int(random(0, 801)), int(random(0, 801)));
  triArr.add(t33);
  t34 = createShape(ELLIPSE, int(random(0, 801)), int(random(0, 801)), int(random(0, 801)), int(random(0, 801)));
  triArr.add(t34);
  t35 = createShape(ELLIPSE, int(random(0, 801)), int(random(0, 801)), int(random(0, 801)), int(random(0, 801)));
  triArr.add(t35);
  t36 = createShape(ELLIPSE, int(random(0, 801)), int(random(0, 801)), int(random(0, 801)), int(random(0, 801)));
  triArr.add(t36);
  t37 = createShape(ELLIPSE, int(random(0, 801)), int(random(0, 801)), int(random(0, 801)), int(random(0, 801)));
  triArr.add(t37);
  t38 = createShape(ELLIPSE, int(random(0, 801)), int(random(0, 801)), int(random(0, 801)), int(random(0, 801)));
  triArr.add(t38);
  t39 = createShape(ELLIPSE, int(random(0, 801)), int(random(0, 801)), int(random(0, 801)), int(random(0, 801)));
  triArr.add(t39);
  t40 = createShape(ELLIPSE, int(random(0, 801)), int(random(0, 801)), int(random(0, 801)), int(random(0, 801)));
  triArr.add(t40);
  t41 = createShape(ELLIPSE, int(random(0, 801)), int(random(0, 801)), int(random(0, 801)), int(random(0, 801)));
  triArr.add(t41);
  t42 = createShape(ELLIPSE, int(random(0, 801)), int(random(0, 801)), int(random(0, 801)), int(random(0, 801)));
  triArr.add(t42);
  t43 = createShape(ELLIPSE, int(random(0, 801)), int(random(0, 801)), int(random(0, 801)), int(random(0, 801)));
  triArr.add(t43);
  t44 = createShape(ELLIPSE, int(random(0, 801)), int(random(0, 801)), int(random(0, 801)), int(random(0, 801)));
  triArr.add(t44);
  t45 = createShape(ELLIPSE, int(random(0, 801)), int(random(0, 801)), int(random(0, 801)), int(random(0, 801)));
  triArr.add(t45);
  t46 = createShape(ELLIPSE, int(random(0, 801)), int(random(0, 801)), int(random(0, 801)), int(random(0, 801)));
  triArr.add(t46);
  t47 = createShape(ELLIPSE, int(random(0, 801)), int(random(0, 801)), int(random(0, 801)), int(random(0, 801)));
  triArr.add(t47);
  t48 = createShape(ELLIPSE, int(random(0, 801)), int(random(0, 801)), int(random(0, 801)), int(random(0, 801)));
  triArr.add(t48);
  t49 = createShape(ELLIPSE, int(random(0, 801)), int(random(0, 801)), int(random(0, 801)), int(random(0, 801)));
  triArr.add(t49);
  t50 = createShape(ELLIPSE, int(random(0, 801)), int(random(0, 801)), int(random(0, 801)), int(random(0, 801)));
  triArr.add(t50);

  int counter = 0;
  color c;
  for(PShape t : triArr) {
    if (counter%3 == 0) c = lightblue;
         else if (counter%3 == 1) c = peach;
         else c = pink;
         t.setFill(c);
         counter++;
  }

  // uncomment to reveal winning code in terminal upon level startup
  //println(codeArr);
  gameStart = 1;

}
//////////////////////////////////////////////////////////////////////////////////////////////////////////////////////////////////
// Resets Second Level //
void clearEllipse() {
  background(0);

  a1.resize(20, 0);
  a2.resize(20, 0);
  a3.resize(20, 0);
  for (int i = 0; i < 100; i++) {
    image(a1, int(random(0, 801)), int(random(0, 801)));
  }
  for (int i = 0; i < 100; i++) {
    image(a2, int(random(0, 801)), int(random(0, 801)));
  }
  for (int i = 0; i < 100; i++) {
    image(a3, int(random(0, 801)), int(random(0, 801)));
  }
  // text
  font = loadFont("OCRAStd-30.vlw");
  text(c1, p1, p2);
  text(c2, p3, p4);
  text(c3, p5, p6);
  text(c4, p7, p8);
}
/////////////////////////////////////////////////////////////////////////////////////////////////////////////////
// Get Win Scene //
void getWin() {
  if (winStart == 0) {
    initWin();
  }
 background(36, 226, 234);
  PImage balloon = loadImage("b1.png");
  balloon.resize(50, 0);
  for (int i = 0; i < 20; i++) {
    image(balloon, int(random(0, 801)), int(random(0, 801)));
  }
  text("You Win!!!", 230, 400);
}
////////////////////////////////////////////////////////////////////////////////////////////////////
// Init Win Scene //
void initWin() {
  frameRate(5);
  winStart = 1;
}
////////////////////////////////////////////////////////////////////////////////////////////////////
// Instructions Scene //
void getInstructions() {
  if (instrStart == 0) {
    initInstr();
  }
  frameRate(10);
  background(r, g, b);
  // images
  a1.resize(50, 0);
  a2.resize(50, 0);
  a3.resize(50, 0);
  for (int i = 0; i < 20; i++) {
    image(a1, int(random(0, 801)), int(random(0, 801)));
  }
  for (int i = 0; i < 20; i++) {
    image(a2, int(random(0, 801)), int(random(0, 801)));
  }
  for (int i = 0; i < 20; i++) {
    image(a3, int(random(0, 801)), int(random(0, 801)));
  }

  // title
  font = loadFont("OCRAStd-48.vlw");
  textFont(font);
  text("Instructions", 185, 200);

  // Instructions
  font = loadFont("OCRAStd-18.vlw");
  textFont(font);
  text("Use the sensors hooked up to the Arduino\nto figure out how to manipulate the shapes on the screen\nto reveal the 4 digit code hidden underneath of them.\nOnce you figure out the digits, you have to figure\nout the order. Enter your guesses into the keypad.\nYour current guess will display in the terminal\nOnce you guess correctly, a winning screen will appear.\nGood luck and have fun!", 50, 300);
  // button
  back.setBroadcast(true);

}
////////////////////////////////////////////////////////////////////////////////////////////////////////////////////////
// Init Instructions Scene //
void initInstr() {
  b1.hide();
  b2.hide();
  back.show();
  instrStart = 1;
}