Description:
Seinen Chess is a metaphorical tournament-style visual of a standard game of chess. Made to entertain most people of wider demographics, Seinen Chess involves a collection of animation reels that depicts each piece’s attack move. Lights and visual counters are provided to the viewers to determine who has more pieces and who took who’s piece. Players can still play chess as most people normally do, only requirement is after an attack they must scan the bottom of their pieces to the RFID scanner next to the screen so as to keep the audience updated.
Parts Needed:
- RFID-RC522 Scanner
- 2-32 RFID stickers (2 for present beta, 32 for the whole board, MAKE SURE THEY ARE COMPATIBLE WITH RC522)
- Three alligator clips (For LED Neopixels)
- One strip of 10 LED Neopixels
- 10 wires (that can easily connect to pin slots, must be less than 4 inches so as to not get in the way of the scanner)
- Breadboard (size does not matter, though preferably small)
- Tape (to stick Neopixels above computer/screen that is presenting the processing animation reel)
- Arduino Uno w/Arduino USB 3.0 cable (No batteries, however it is BYOC, aka Bring Your Own Computer)
- Your Own Computer
Documentation Images:
There is not much instruction on how to set up Seinen Chess, just don’t plug the Arduino USB cable to the computer until everything is set up, so as to avoid short-circuiting.
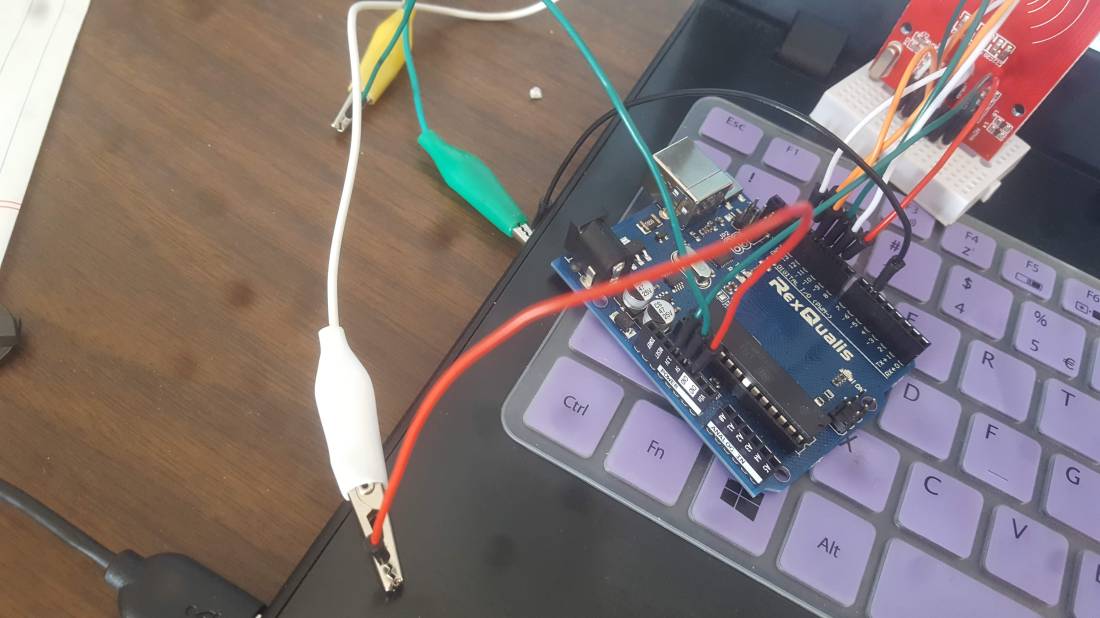
The alligator clips are used to connect the wires from the pins to the LED Neopixel strip.
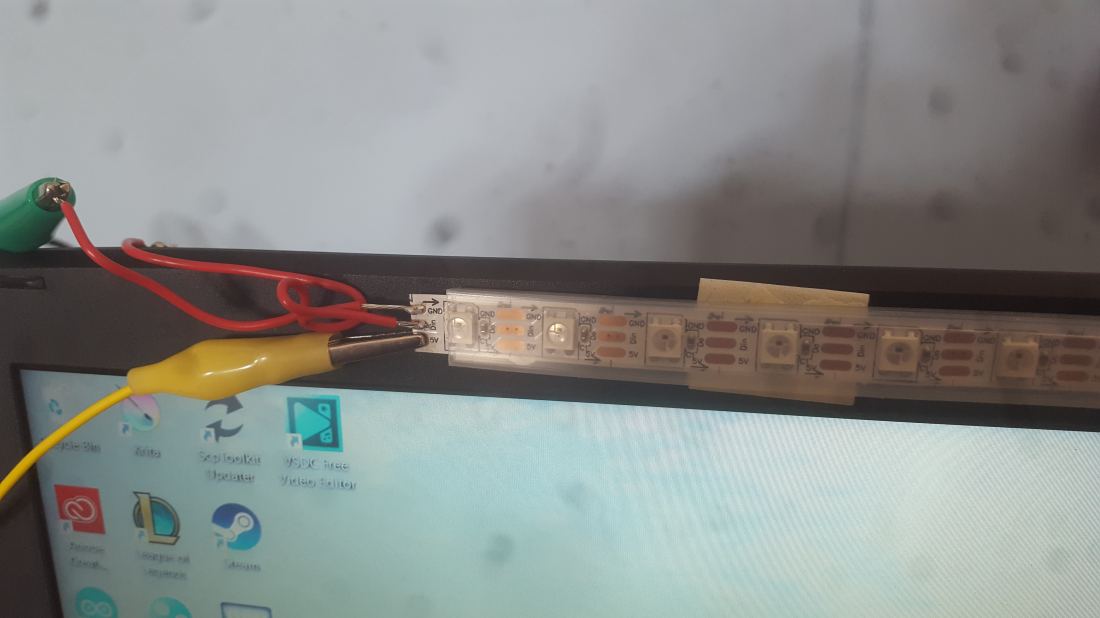
Originally, I had wires soldered to the strip. However, the copper bit that the yellow alligator clip is connected to is in bad condition of solder adhesion. You can use alligator clips here instead of also soldering wires to he strip, but make sure the wires/clips do not touch each other when connecting. The wire on top disappears behind the laptop screen, but that’s because it is connected to the white alligator clip (for GND) and I did not want the wires to get in the way of the screen. If you want you could tape the wires to the left corner of the screen for less risk of falling. It should not be too much of an issue after taping the Neopixels to the middle top of the screen. Highly recommended to tape Neopixel strip before connecting the alligator clips.

For eased portability, I highly recommend finding a breadboard as small as this one, with enough pins to fit the RFID scanner and the wires that connect the scanner to the Arduino board. Read the posted Arduino code to make sure to connect the wires on the scanner to the right pins (Bolded and underlined in the beginning of the Arduino code are the corresponding Arduino pins. SDA(SS) is the same thing as SSN)
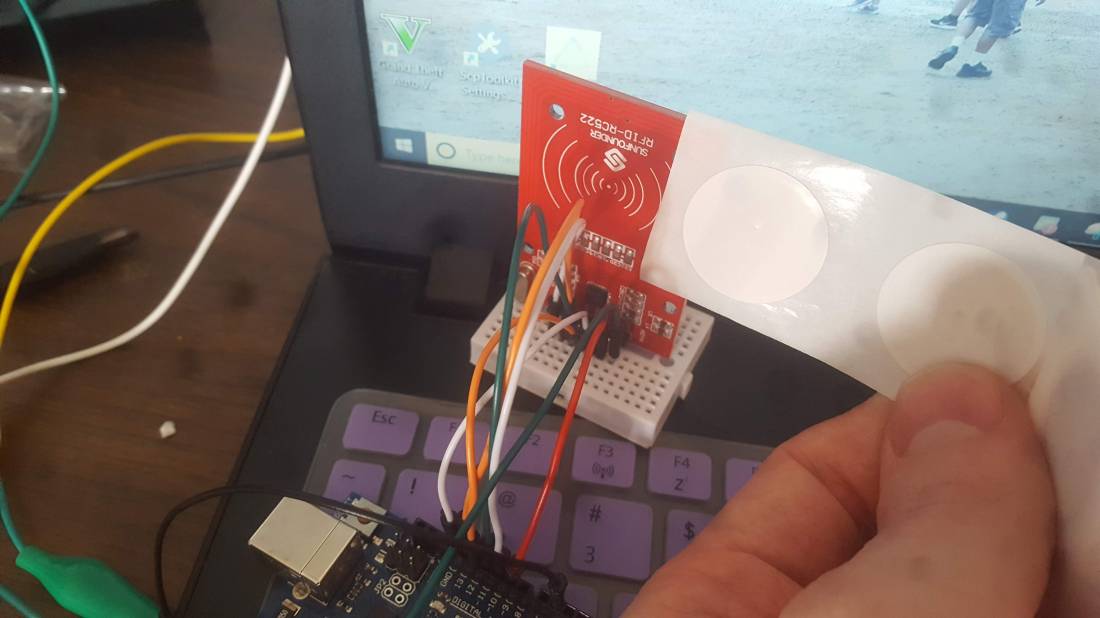
These are the stickers you scan with. The stickers you will order will have a different string UID than mine. When the wiring is set up and the USB plugged in, copy and paste the posted arduino code into your arduino IDE and compile & run. Pull up the serial monitor. You can place your sticker either on the printed side or blank side of the scanner within the range of a centimeter or two. It will print out values in the serial monitor when the sticker has been successfully scanned. The “String UID” will be what triggers the animations in Processing. It will say “Not a valid piece”. Make sure to copy and paste the given string UID from the serial monitor to replace the string in the first or second if statements. Make sure the same is done with the if statements with the same string in Processing.
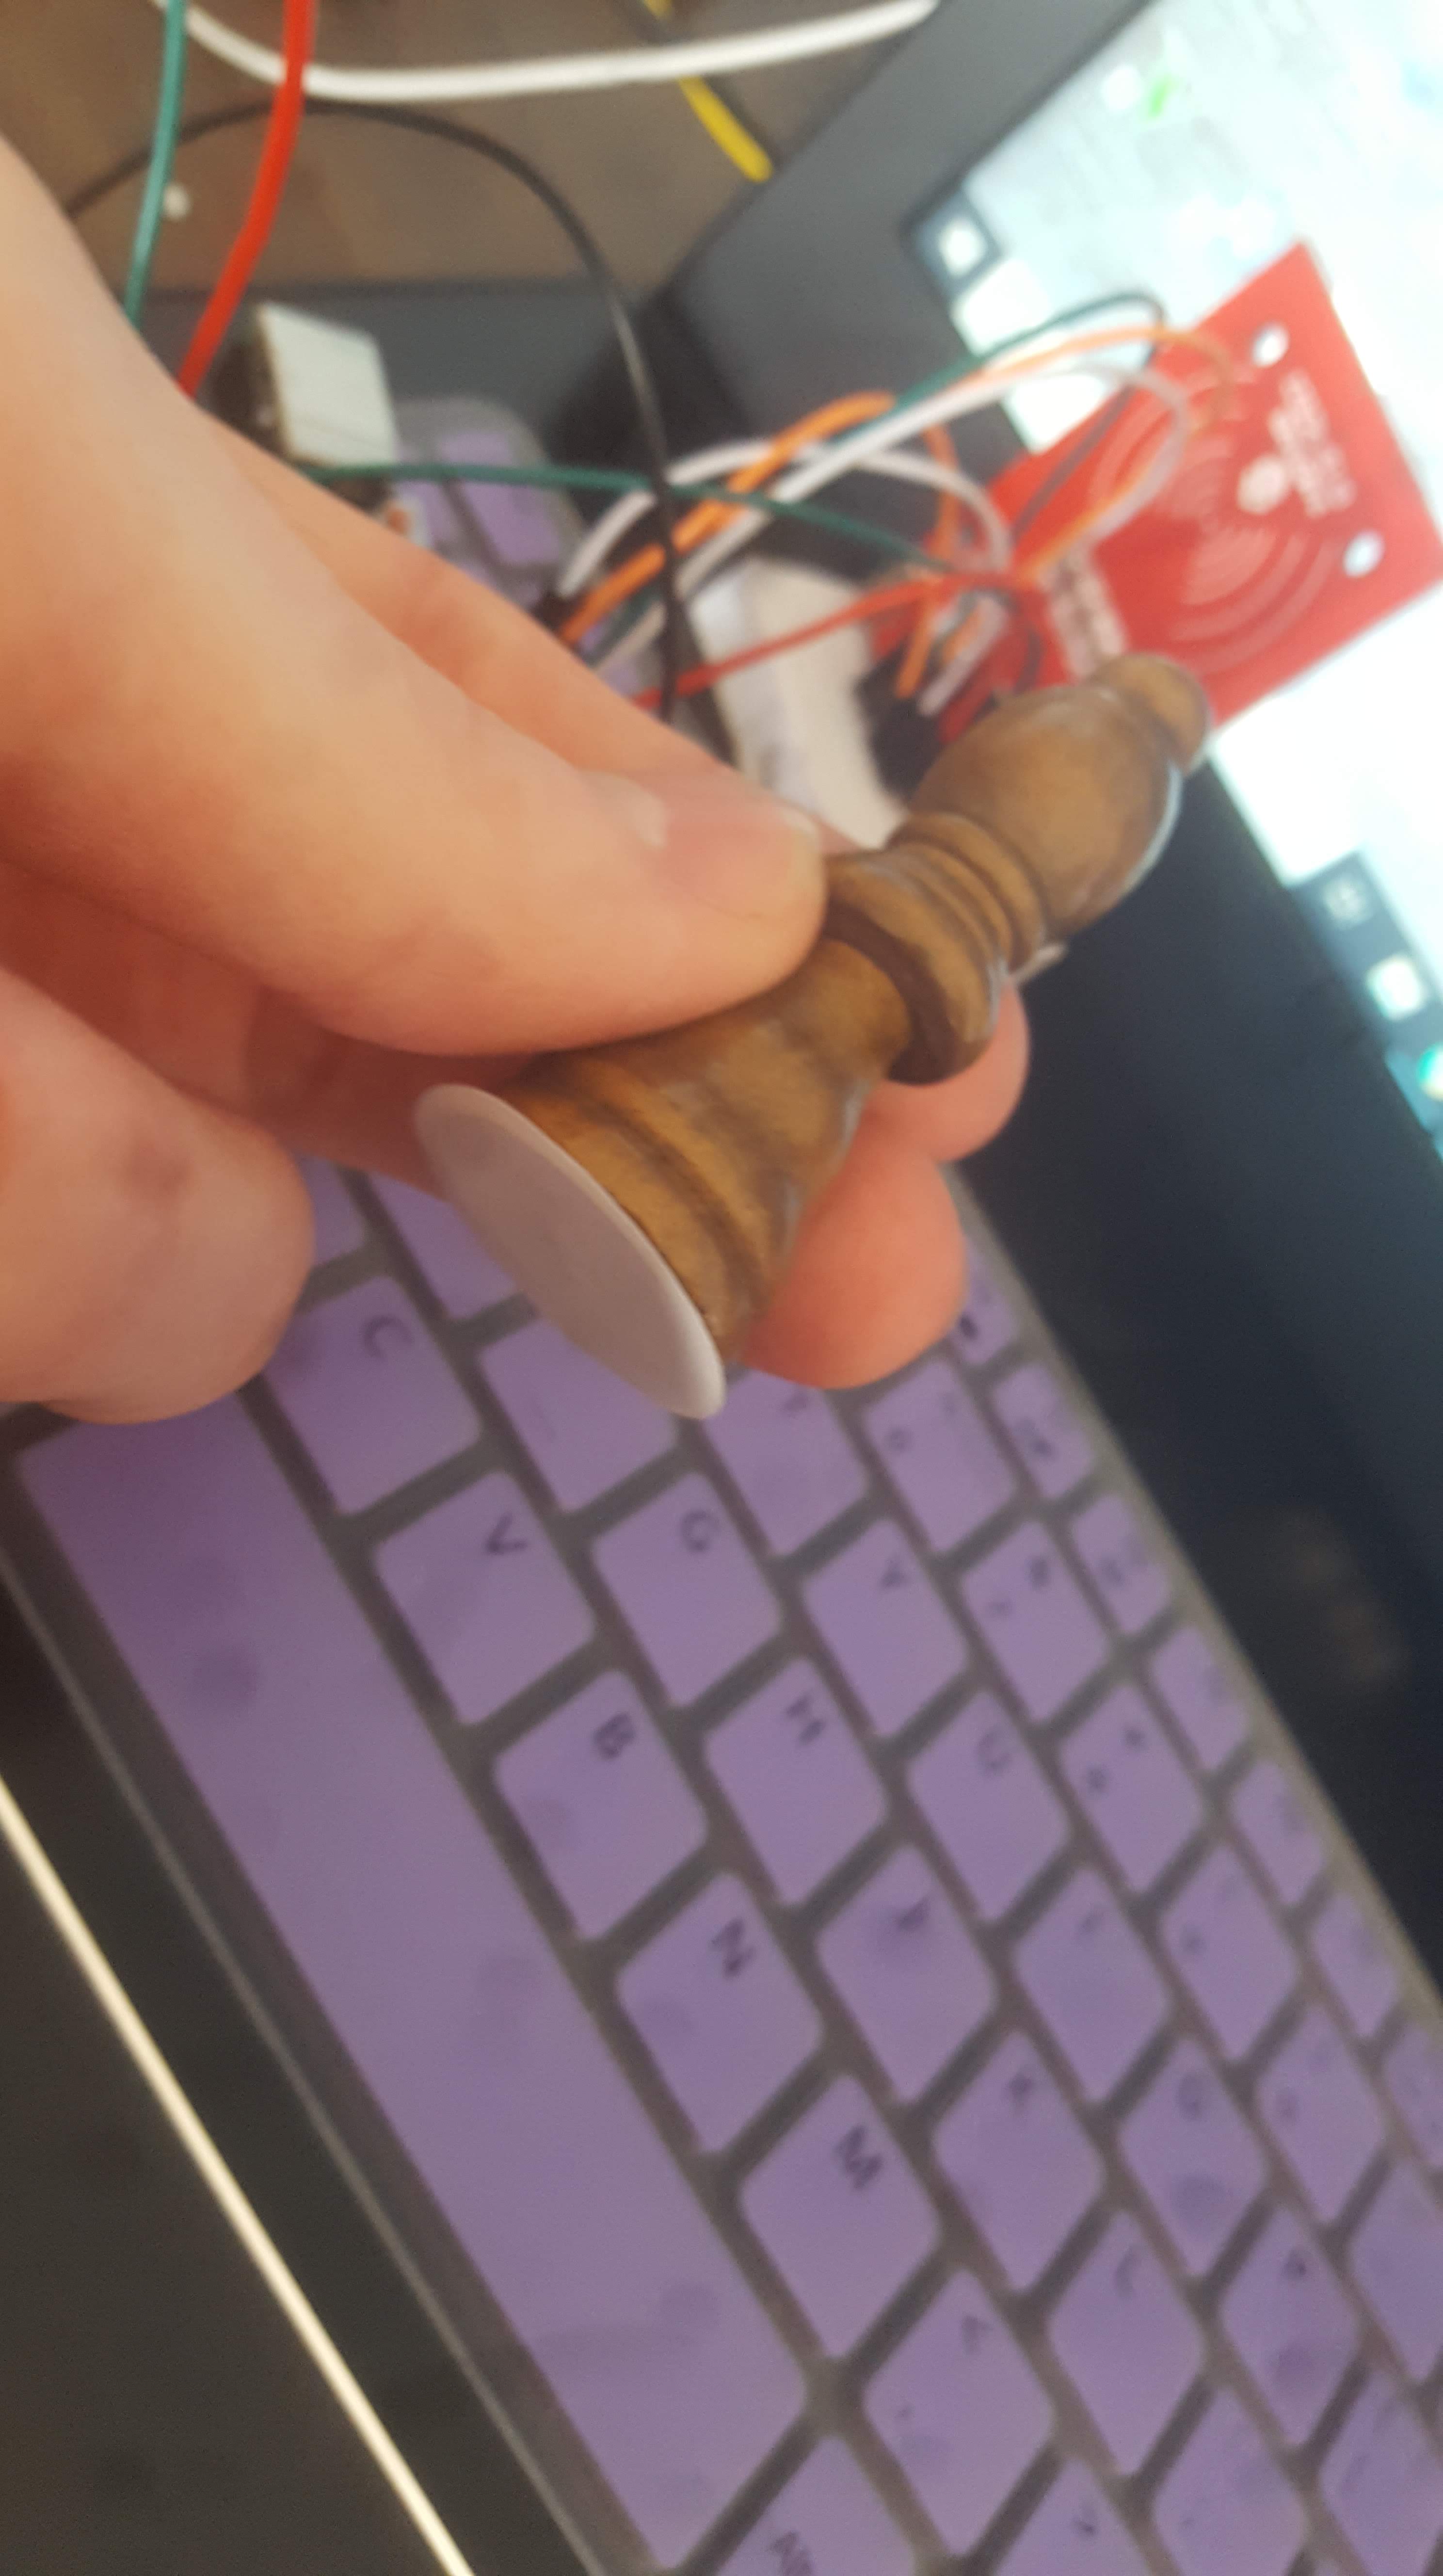
Then place the sticker on the bottom of the piece its respective UID is assigned to (i.e. Queen1/white queen, or Bishop1/black bishop), like so. Change the code or add more if statements if you want to configure the pieces and/or add more pieces your own way. Note the Processing file I will provide only work for two pieces, specifically queen and bishop. More pieces would require more animation which would require more time counters as seen in the posted Processing code below, otherwise nothing else would output from Processing.
Arduino Code:
/—————————-
/*
* ——————————————————————————————————————–
* Example sketch/program showing how to read new NUID from a PICC to serial.
* ——————————————————————————————————————–
* This is a MFRC522 library example; for further details and other examples see: https://github.com/miguelbalboa/rfid
*
* Example sketch/program showing how to the read data from a PICC (that is: a RFID Tag or Card) using a MFRC522 based RFID
* Reader on the Arduino SPI interface.
*
* When the Arduino and the MFRC522 module are connected (see the pin layout below), load this sketch into Arduino IDE
* then verify/compile and upload it. To see the output: use Tools, Serial Monitor of the IDE (hit Ctrl+Shft+M). When
* you present a PICC (that is: a RFID Tag or Card) at reading distance of the MFRC522 Reader/PCD, the serial output
* will show the type, and the NUID if a new card has been detected. Note: you may see “Timeout in communication” messages
* when removing the PICC from reading distance too early.
*
* @license Released into the public domain.
*
* Typical pin layout used:
* —————————————————————————————–
* MFRC522 Arduino Arduino Arduino Arduino Arduino
* Reader/PCD Uno/101 Mega Nano v3 Leonardo/Micro Pro Micro
* Signal Pin Pin Pin Pin Pin Pin
* —————————————————————————————–
* RST/Reset RST 9 5 D9 RESET/ICSP-5 RST
* SPI SS SDA(SS) 10 53 D10 10 10
* SPI MOSI MOSI 11 / ICSP-4 51 D11 ICSP-4 16
* SPI MISO MISO 12 / ICSP-1 50 D12 ICSP-1 14
* SPI SCK SCK 13 / ICSP-3 52 D13 ICSP-3 15
*/
//Buzzer
//RFID
#include <SPI.h>
#include <MFRC522.h>
#define SS_PIN 10
#define RST_PIN 9
//END OF RFID
//LED NEOPIXELS
#include <Adafruit_NeoPixel.h>
#ifdef __AVR__
#include <avr/power.h>
#endif
// Which pin on the Arduino is connected to the NeoPixels?
#define PIN 6
// How many NeoPixels are attached to the Arduino? (Should be changed if adding more or less than 10)
#define NUMPIXELS 10
// When we setup the NeoPixel library, we tell it how many pixels, and which pin to use to send signals.
// Note that for older NeoPixel strips you might need to change the third parameter–see the strandtest
// example for more information on possible values.
Adafruit_NeoPixel pixels = Adafruit_NeoPixel(NUMPIXELS, PIN, NEO_GRB + NEO_KHZ800);
//END OF NEOPIXELS
MFRC522 rfid(SS_PIN, RST_PIN); // Instance of the class
MFRC522::MIFARE_Key key;
String pieceString;
// Init array that will store new NUID
byte nuidPICC[4];
void setup() {
Serial.begin(9600);
SPI.begin(); // Init SPI bus
rfid.PCD_Init(); // Init MFRC522
//Checks and stores for hex info to store in array
for (byte i = 0; i < 6; i++) {
key.keyByte[i] = 0xFF;
}
pixels.begin(); // This initializes the NeoPixel library.
}
void loop() {
//Neopixels flash red and green alternatively
RGBLoop();
// Look for new cards
if ( ! rfid.PICC_IsNewCardPresent())
return;
// Verify if the NUID has been readed
if ( ! rfid.PICC_ReadCardSerial())
return;
//rfid (in four two character bytes) is then stored into a new array
for (byte i = 0; i < 4; i++) {
nuidPICC[i] = rfid.uid.uidByte[i];
}
//Prints in the console
Serial.print(“Card UID:”);
pieceString = “”;//UID string initialized empty
printHex(rfid.uid.uidByte, rfid.uid.size);
Serial.println();
rfid.PICC_HaltA();
rfid.PCD_StopCrypto1();
Serial.println();
//Prints string UID
Serial.print(pieceString);
Serial.println();
//If player beats another’s piece and scans their piece (or just scans their piece)
if(pieceString == “3825312064”){// Must Change
Serial.print(“Queen1”);//Tests to see if UID matches in console
Strobe(255, 0, 0, 10, 100, 1000);//Flashes strobes of red sice it is a white piece
}
else if(pieceString == “86312164”){// Must Change
Serial.print(“Bishop1”);
Strobe(0, 255, 0, 10, 100, 1000);//Flashes strobes of green sice it is a black piece
}
else{
//Makes sure all pieces are identified and no extra UID is valid
Serial.print(“Not a valid piece”);
}
Serial.println();
Serial.print(“String UID:”);
Serial.println();
Serial.println(pieceString);//Prints twice to notify reader the string again
//Also links string to processing
}
void printHex(byte *buffer, byte bufferSize) {
for (byte i = 0; i < bufferSize; i++) {
//Changes the byte type UID into string
pieceString = pieceString + String(rfid.uid.uidByte[i]);
//Still prints out HEX UID
Serial.print(buffer[i] < 0x10 ? ” 0″ : ” “);
Serial.print(buffer[i], HEX);
}
}
void RGBLoop(){
for(int j=0; j< 10; j++){
for(int k = 0; k < 256; k++ ) {
//In odd numbered pixels they are red, in even pixels they are green
if(j%2 ==0){
pixels.setPixelColor(j, pixels.Color(0,k,0));
}
else{
pixels.setPixelColor(j, pixels.Color(k,0,0));
}
pixels.show();
delay(1);
}
}
for(int j=0; j< 10; j++){
for(int k = 0; k < 256; k++ ) {
//Same process as previous for loops but colors switch so the strip does not stay the same
if(j%2 ==0){
pixels.setPixelColor(j, pixels.Color(k,0,0));
}
else{
pixels.setPixelColor(j, pixels.Color(0,k,0));
}
pixels.show();
delay(1);
}
}
}
void Strobe(int redgreen, int redgreen2,int redgreen3, int StrobeCount, int FlashDelay, int EndPause){
//All pixels turn on and off quickly, color depends on victor of attack move
for(int j = 0; j < StrobeCount; j++) {
pixels.setPixelColor(0, pixels.Color(redgreen,redgreen2,0));
pixels.setPixelColor(1, pixels.Color(redgreen,redgreen2,0));
pixels.setPixelColor(2, pixels.Color(redgreen,redgreen2,0));
pixels.setPixelColor(3, pixels.Color(redgreen,redgreen2,0));
pixels.setPixelColor(4, pixels.Color(redgreen,redgreen2,0));
pixels.setPixelColor(5, pixels.Color(redgreen,redgreen2,0));
pixels.setPixelColor(6, pixels.Color(redgreen,redgreen2,0));
pixels.setPixelColor(7, pixels.Color(redgreen,redgreen2,0));
pixels.setPixelColor(8, pixels.Color(redgreen,redgreen2,0));
pixels.setPixelColor(9, pixels.Color(redgreen,redgreen2,0));
pixels.show();
delay(FlashDelay);
pixels.setPixelColor(0, pixels.Color(0,0,0));
pixels.setPixelColor(1, pixels.Color(0,0,0));
pixels.setPixelColor(2, pixels.Color(0,0,0));
pixels.setPixelColor(3, pixels.Color(0,0,0));
pixels.setPixelColor(4, pixels.Color(0,0,0));
pixels.setPixelColor(5, pixels.Color(0,0,0));
pixels.setPixelColor(6, pixels.Color(0,0,0));
pixels.setPixelColor(7, pixels.Color(0,0,0));
pixels.setPixelColor(8, pixels.Color(0,0,0));
pixels.setPixelColor(9, pixels.Color(0,0,0));
//pixels.setPixelColor(j, pixels.Color(0,0,0));
pixels.show();
delay(FlashDelay);
}
delay(EndPause);
}
/—————————-
Processing Code:
/—————————-
import processing.serial.*;
Serial myPort;
String val = “”;
//Time counters to trigger animation
int time = millis();
int timeSync = millis();
int timeSync2 = millis();
//Amount of pieces available on each team
int greenTeam = 16;
int redTeam = 16;
//Initialize all frames used for animations (reville is the intro to the game)
PImage reville;
PImage reville2;
PImage reville3;
PImage reville4;
PImage reville5;
PImage reville6789;
PImage reville10;
PImage reville11;
PImage reville12;
PImage reville13;
PImage reville14;
PImage reville15;
PImage reville16;
PImage reville17;
PImage reville18;
PImage testImage;
PImage testImage2;
PImage testImage3;
//Queen victory reel
PImage Queen;
PImage Queen2;
PImage Queen3;
PImage Queen4;
//Bishop victory reel
PImage bishop;
PImage bishop2;
PImage bishop3;
PImage bishop4;
void setup() {
//Links arduino to processing (note serial number is the same, 9600)
String arduino = “COM3”;
myPort = new Serial(this, arduino, 9600); //you’l have to change the 2nd parameter to what port your arduino is connected to
myPort.bufferUntil(‘\n’);
//Since most of my images are roughly 1200×700
size(1200, 700);
reville = loadImage(“reville1.PNG”);
reville2 = loadImage(“reville2.PNG”);
reville3 = loadImage(“reville3.PNG”);
reville4 = loadImage(“reville4.PNG”);
reville5 = loadImage(“reville5.PNG”);
reville6789 = loadImage(“reville6.PNG”);
reville10 = loadImage(“reville10.PNG”);
reville11 = loadImage(“reville11.PNG”);
reville12 = loadImage(“reville12.PNG”);
reville13 = loadImage(“reville13.PNG”);
reville14 = loadImage(“reville14.PNG”);
reville15 = loadImage(“reville15.PNG”);
reville16 = loadImage(“reville16.PNG”);
reville17 = loadImage(“reville17.PNG”);
reville18 = loadImage(“reville18.PNG”);
bishop = loadImage(“BishopKill1.PNG”);
bishop2 = loadImage(“BishopKill2.PNG”);
bishop3 = loadImage(“BishopKill3.PNG”);
bishop4 = loadImage(“BishopKill4.PNG”);
Queen = loadImage(“KillerQueen1.PNG”);
Queen2 = loadImage(“KillerQueen2.PNG”);
Queen3 = loadImage(“KillerQueen3.PNG”);
Queen4 = loadImage(“KillerQueen4.PNG”);
}
void draw() {
background(0);
//Presents the counter for team pieces
textSize(40);
text(“Red Team:”, 150, 400);
text(redTeam, 375, 400);
text(“Green Team:”, 600, 400);
text(greenTeam, 875, 400);
//Determines the time each frame lasts before moving on to the next one
if((time >= 0)&&(time < 5)){
image(reville, 0, 0);
}
else if((time >= 5)&&(time < 10)){
image(reville2, 0, 0);
}
else if((time >= 10)&&(time < 15)){
image(reville3, 0, 0);
}
else if((time >= 15)&&(time < 20)){
image(reville4, 0, 0);
}
else if((time >= 20)&&(time < 25)){
image(reville5, 0, 0);
}
else if((time >= 25)&&(time < 45)){
image(reville6789, 0, 0);
}
else if((time >= 45)&&(time < 50)){
image(reville10, 0, 0);
}
else if((time >= 50)&&(time < 55)){
image(reville11, 0, 0);
}
else if((time >= 55)&&(time < 60)){
image(reville12, 0, 0);
}
else if((time >= 60)&&(time < 65)){
image(reville13, 0, 0);
}
else if((time >= 65)&&(time < 70)){
image(reville14, 0, 0);
}
else if((time >= 70)&&(time < 75)){
image(reville15, 0, 0);
}
else if((time >= 75)&&(time < 80)){
image(reville16, 0, 0);
}
else if((time >= 80)&&(time < 88)){
image(reville17, 0, 0);
}
else if((time >= 88)&&(time < 300)){
image(reville18, 0, 0);
}
//If UID matches white queen’s
if(val.equals(“3825312064”)){// Must change
timeSync = 0;
}
//Makes sure timeSync is different from time (used for reville)
//so no two different frames play simultaneously (plays Queen’s victory reel)
if((timeSync < time)&&(timeSync >= 0)&&(timeSync < 25)){
image(Queen, 0 , 0);
}
else if((timeSync < time)&&(timeSync >= 25)&&(timeSync < 80)){
image(Queen2, 0, 0);
}
else if((timeSync < time)&&(timeSync >= 80)&&(timeSync < 120)){
image(Queen3, 0, 0);
}
else if((timeSync < time)&&(timeSync >= 120)&&(timeSync < 170)){
image(Queen4, 0, 0);
if(timeSync == 169){
greenTeam = greenTeam – 1;//Green Team loses a piece
}
}
//If UID matches black bishop’s
if(val.equals(“86312164”)){// Must change
timeSync2 = 0;
}
//Plays Bishop’s victory reel
if((timeSync2 < time)&&(timeSync2 >= 0)&&(timeSync2 < 25)){
image(bishop, 0 , 0);
}
else if((timeSync2 < time)&&(timeSync2 >= 25)&&(timeSync2 < 50)){
image(bishop2, 0, 0);
}
else if((timeSync2 < time)&&(timeSync2 >= 50)&&(timeSync2 < 110)){
image(bishop3, 0, 0);
}
else if((timeSync2 < time)&&(timeSync2 >= 110)&&(timeSync2 < 200)){
image(bishop4, 0, 0);
if(timeSync2 == 199){
redTeam = redTeam – 1;//Red Team loses a piece
}
}
//All time counters increment
time++;
timeSync++;
timeSync2++;
println(time + ” ” + timeSync);//Test in console to make sure times are incrementing and resetting
}
void serialEvent(Serial myPort){
val = myPort.readStringUntil(‘\n’);
val = trim(val);
}
/—————————-
Animation files (Make sure the images are in the same folder as your Processing file, only accessible with UIC email)
Video (I accidentally switched the teams’ piece counters on Processing in the video, so imagine Red Team is Green Team and Green Team is Red Team. I changed the posted Processing code to fix that issue. There will also be a small pause where I don’t scan the piece right due to bad hand-eye coordination and loop delay 😦 )
UPDATE: Best to mute the video, no audio matters and it’s just my loud and obnoxious heater
2-3 Page Document (Only accessible with UIC email, the empty third page was not meant to be there btw)
Sources:
Help from setting up strobe and alternating lights:
https://www.tweaking4all.com/hardware/arduino/adruino-led-strip-effects/
Help from setting up Arduino code that prints only UID:
https://forum.arduino.cc/index.php?topic=444745.0 (@Daredevil426)
Help from setting up Arduino-Processing syncing (Via serial communication):
Mahal’s Interactive/Wearable Project:
(手伝ってくれてありがとうございます! :))
